Automatron April
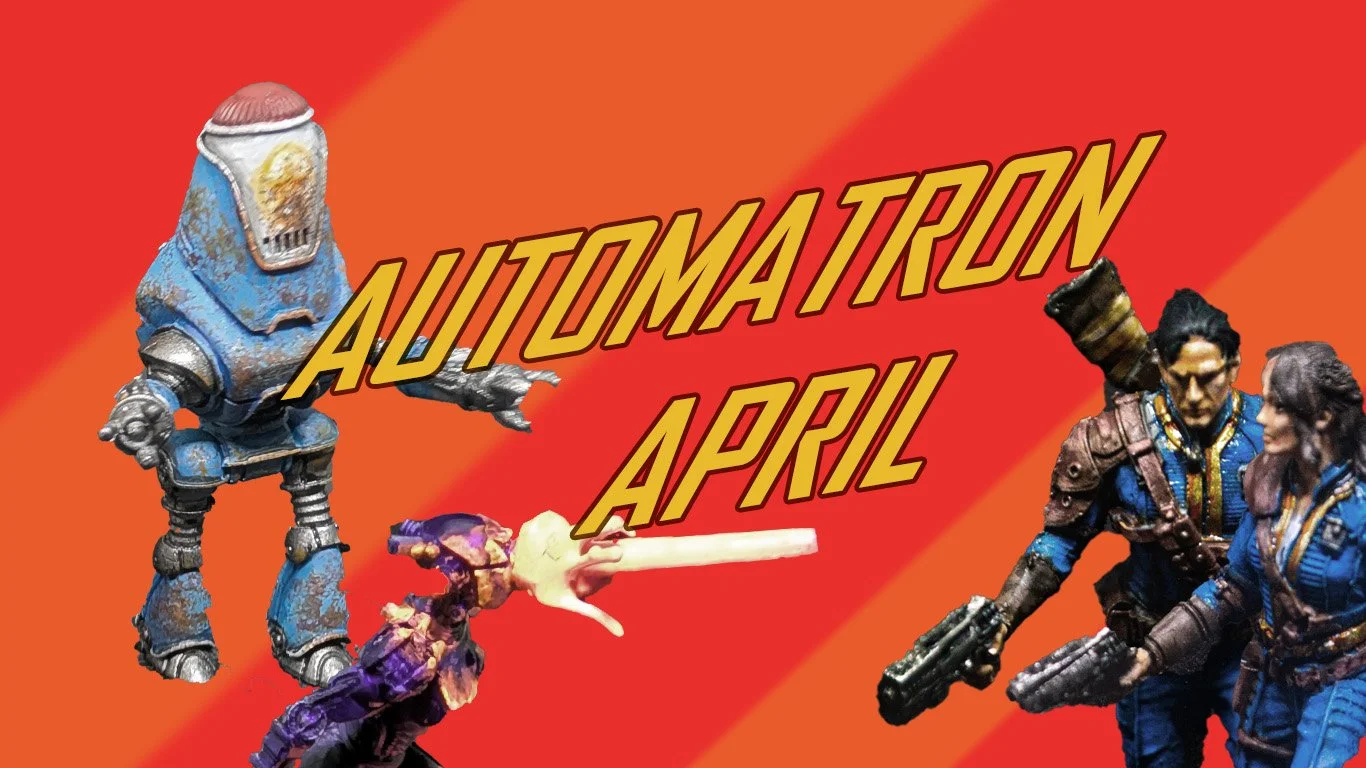
Automatron April!
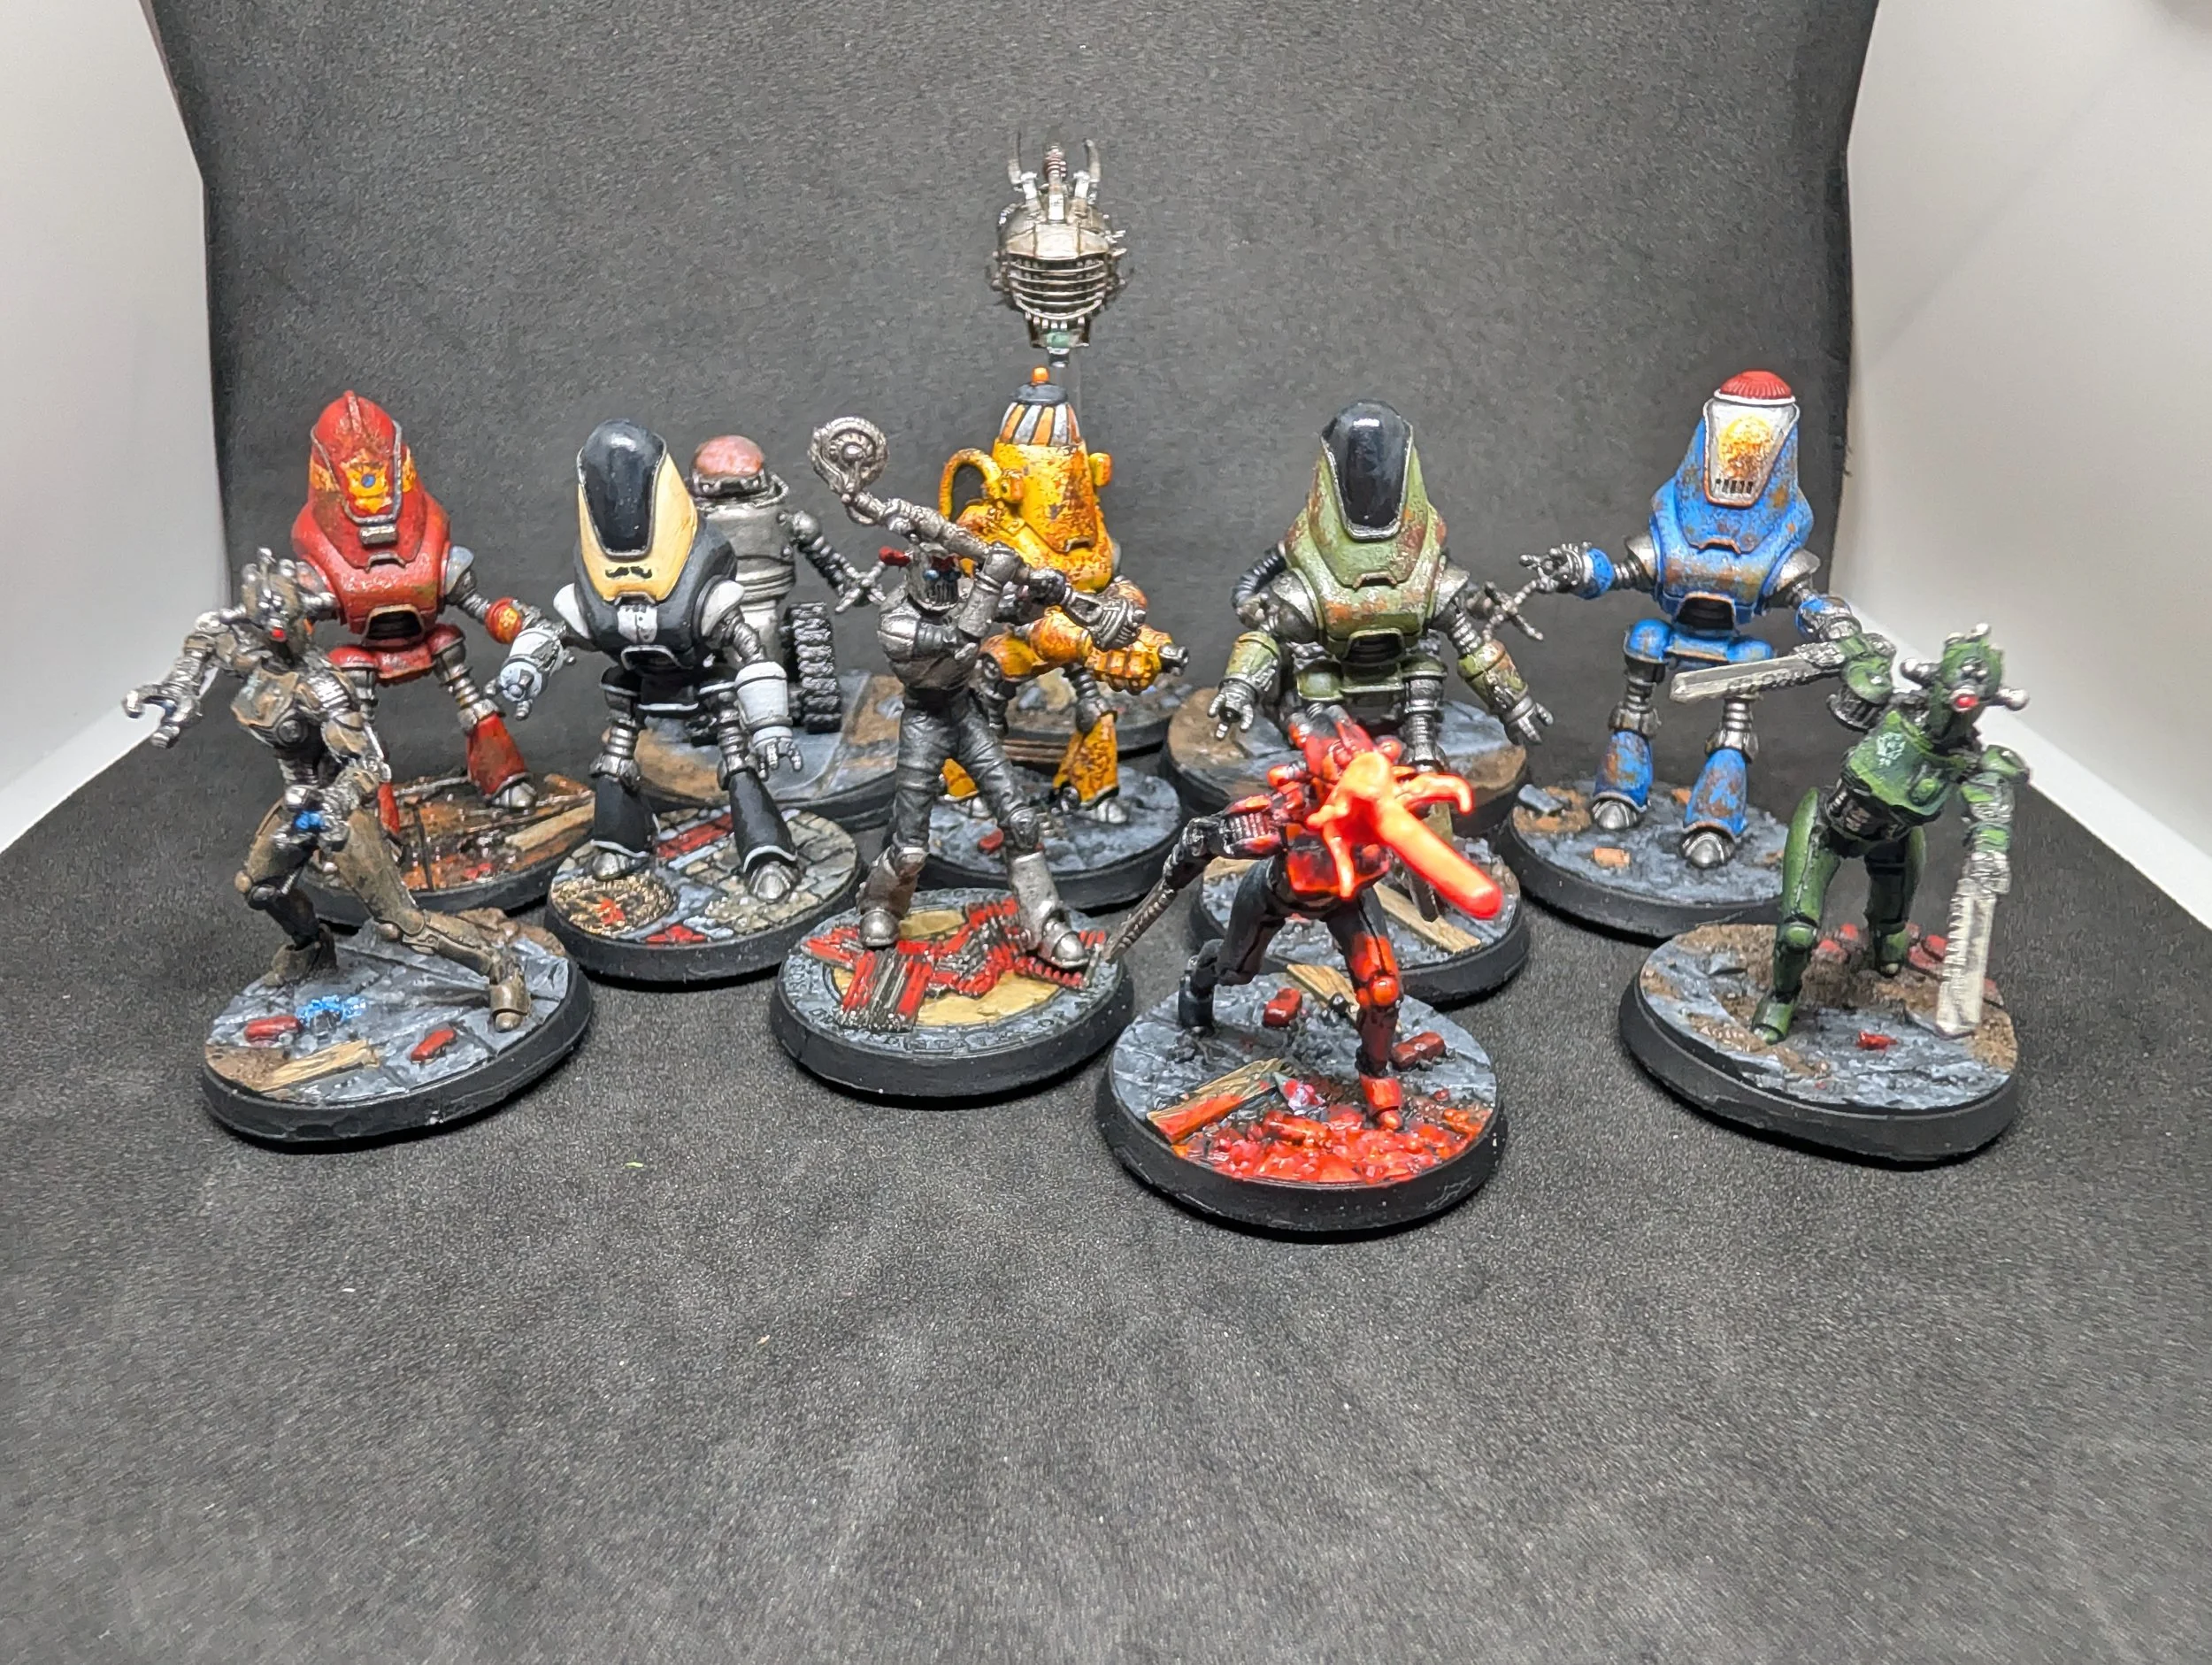
This month, I’ve been focusing on painting robots! And in my collection of models, I have plenty of robots in my Fallout selection. Previously, I have painted a bunch of Mr Handy robots in various styles, like Mr Gutsy, a weathered Mr Handy, a shiny and pristine Codsworth, and a Curie/Miss Nanny, and also the terrifying Sentry Bot with magnetised loadout. This month gave me the opportunity to get some more types of robot battle ready, so let’s take a look!
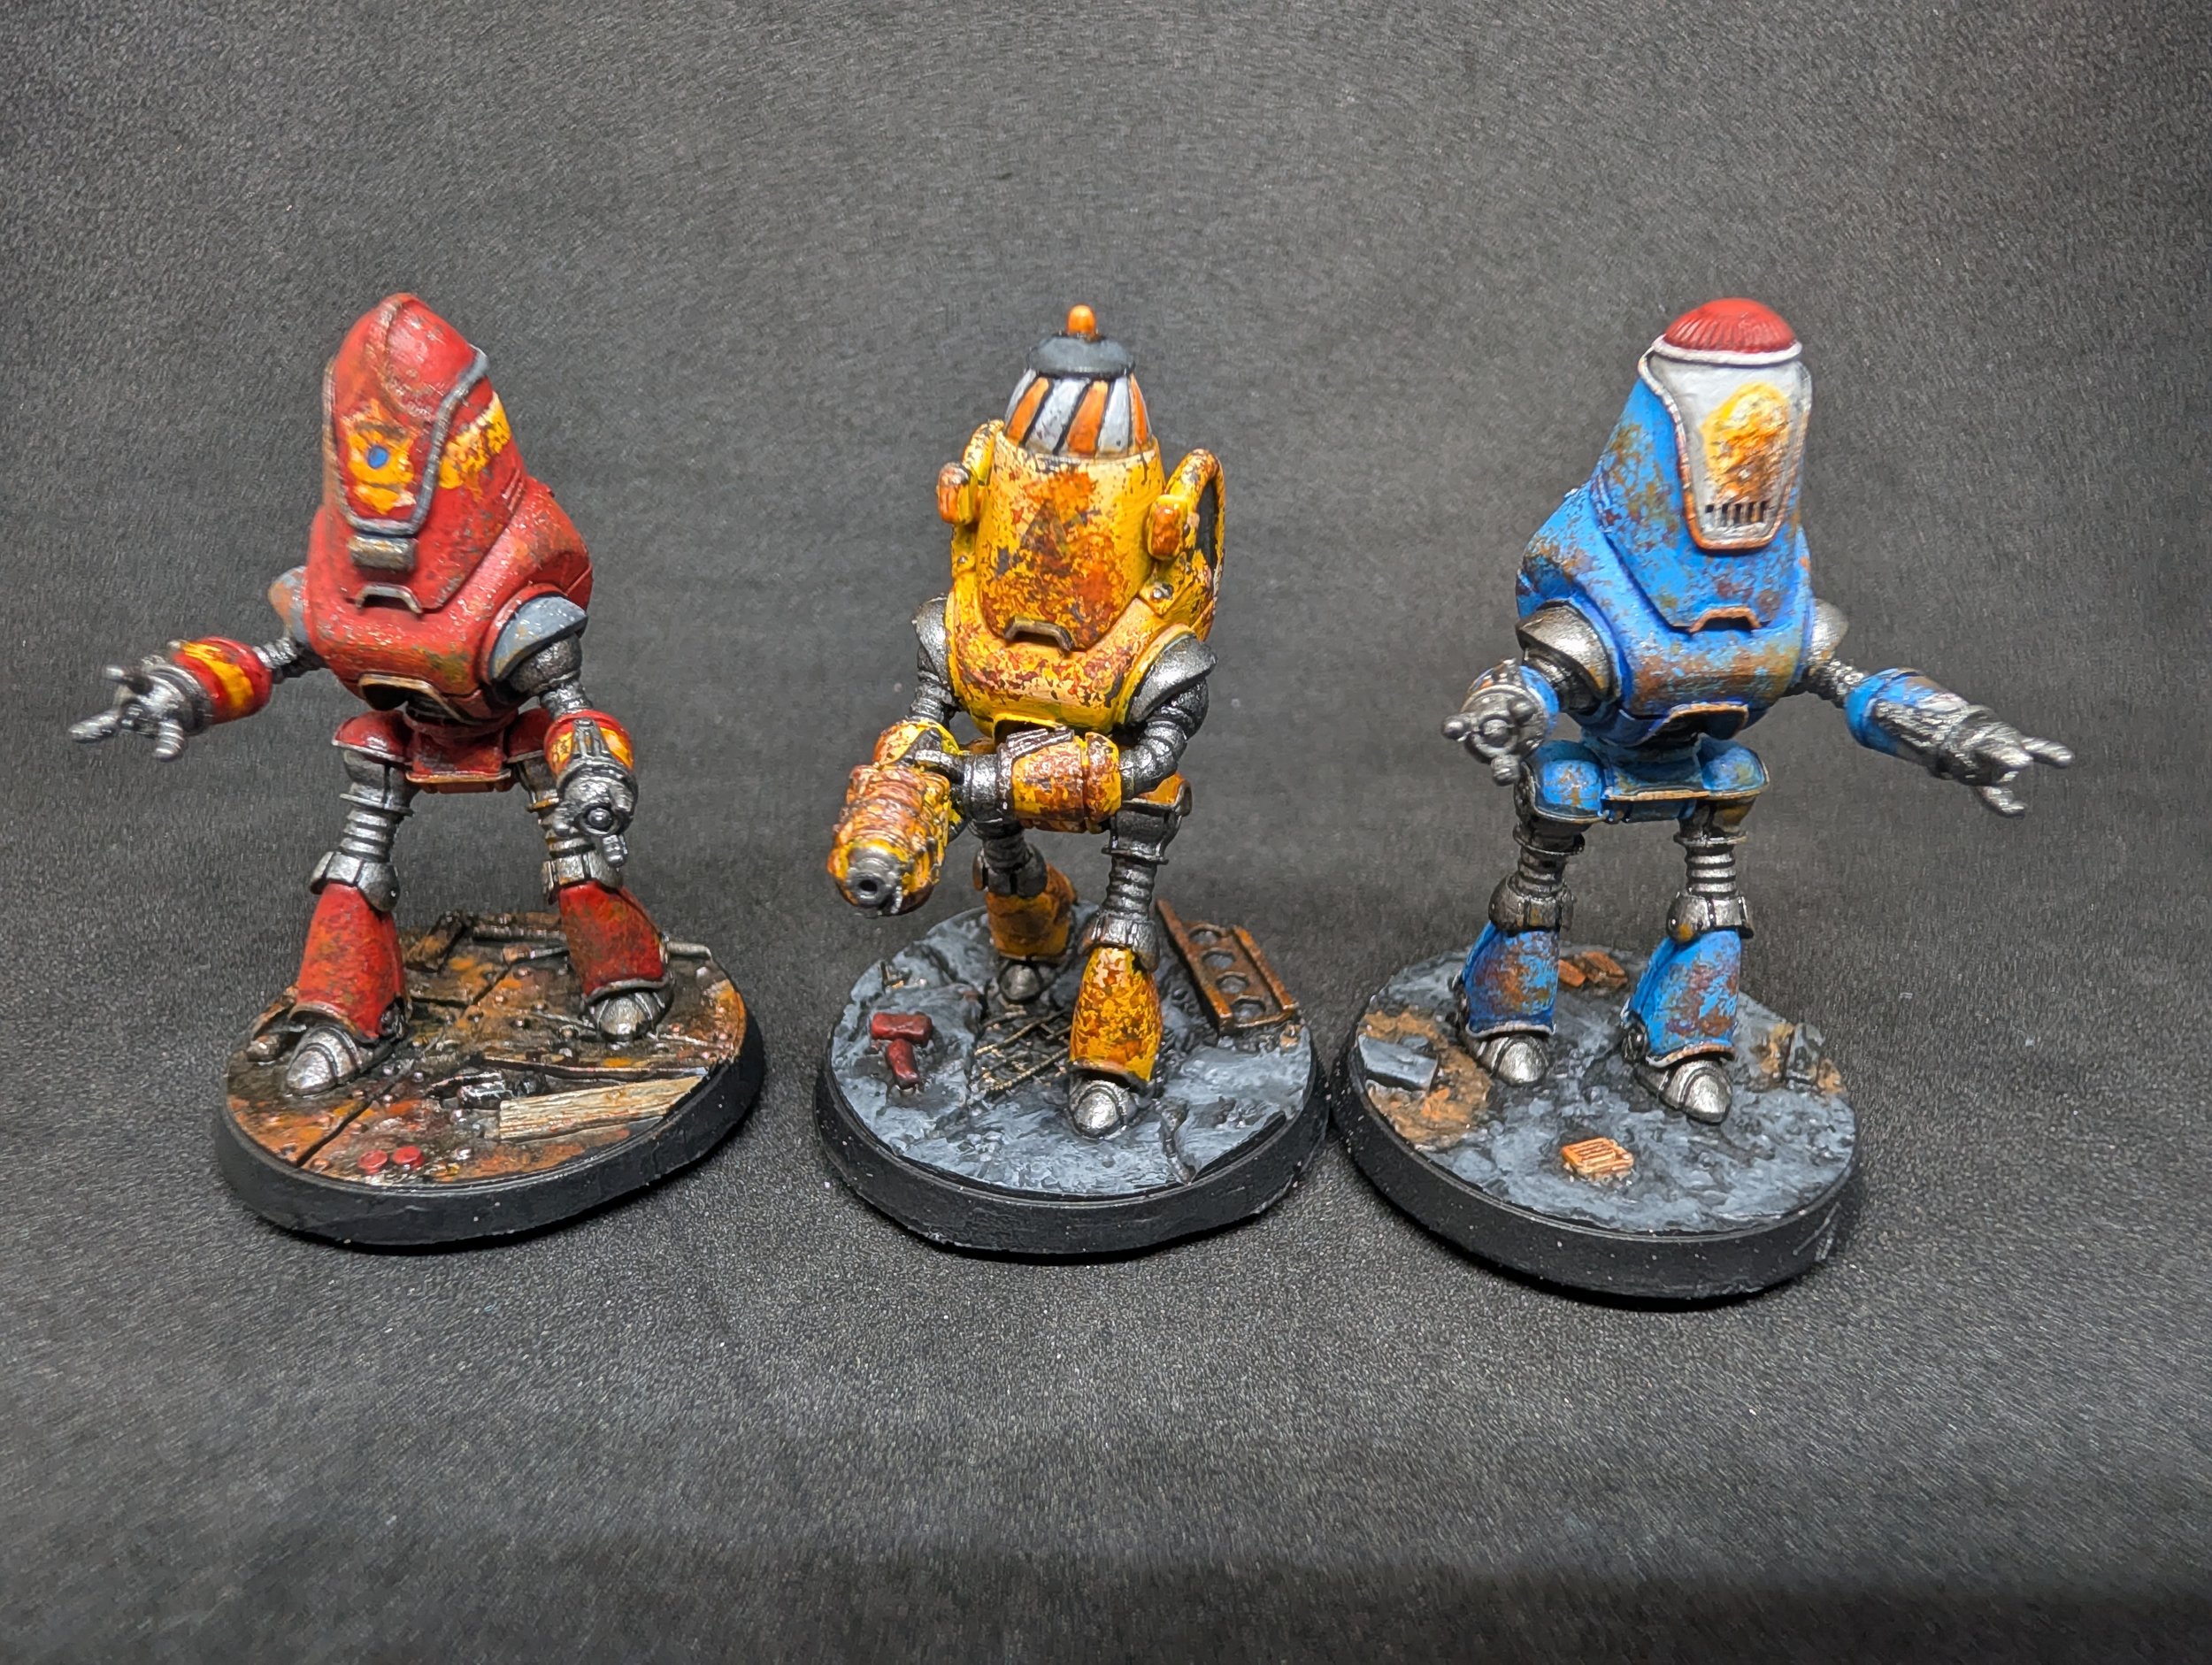


PROTECTRONS
The humble Protectron is an iconic robot within Fallout, heavily inspired by Forbidden Planet’s Robbie The Robot. Fallout 4 introduced us to a new sleek style to the basic model which really emphasised the Retro-Futuristic aesthetic that Fallout is known for. I wanted all of my Protectrons to have a unique colour scheme, making them look interesting on the board. The job specific Protectrons were easy to do, being the Fire Brigadeer, Construction and Police units, they have their own colours and are really bold and bright, even with weathered and beaten up. The basic Protectron got a green scheme, which left me with a problem. Thinking of the Protectrons in Fallout 4, I remember seeing green, tan and light blue Protectrons. The tan colour would be too close to the Construction unit, the light blue would be too close to the Police unit. Then I remembered the Protectrons in the Whitespring Resort on Fallout 76. Yes, they have a tan headpiece, but the majority of the paintwork is a Tuxedo, and this would look very striking on the table. I also avoided weathering this robot, because I thought the a Tuxedo Protectron would be maintained well by some kind of system, or a keeper. And using the model on the Freedom Trail base, I gave myself some head canon that this unit worked at the Prost bar (The Fallout 4 version of the Cheers bar in the Boston Common, where the Freedom Trail begins.) Also, he has a smart little bowtie and a rather fetching moustache!
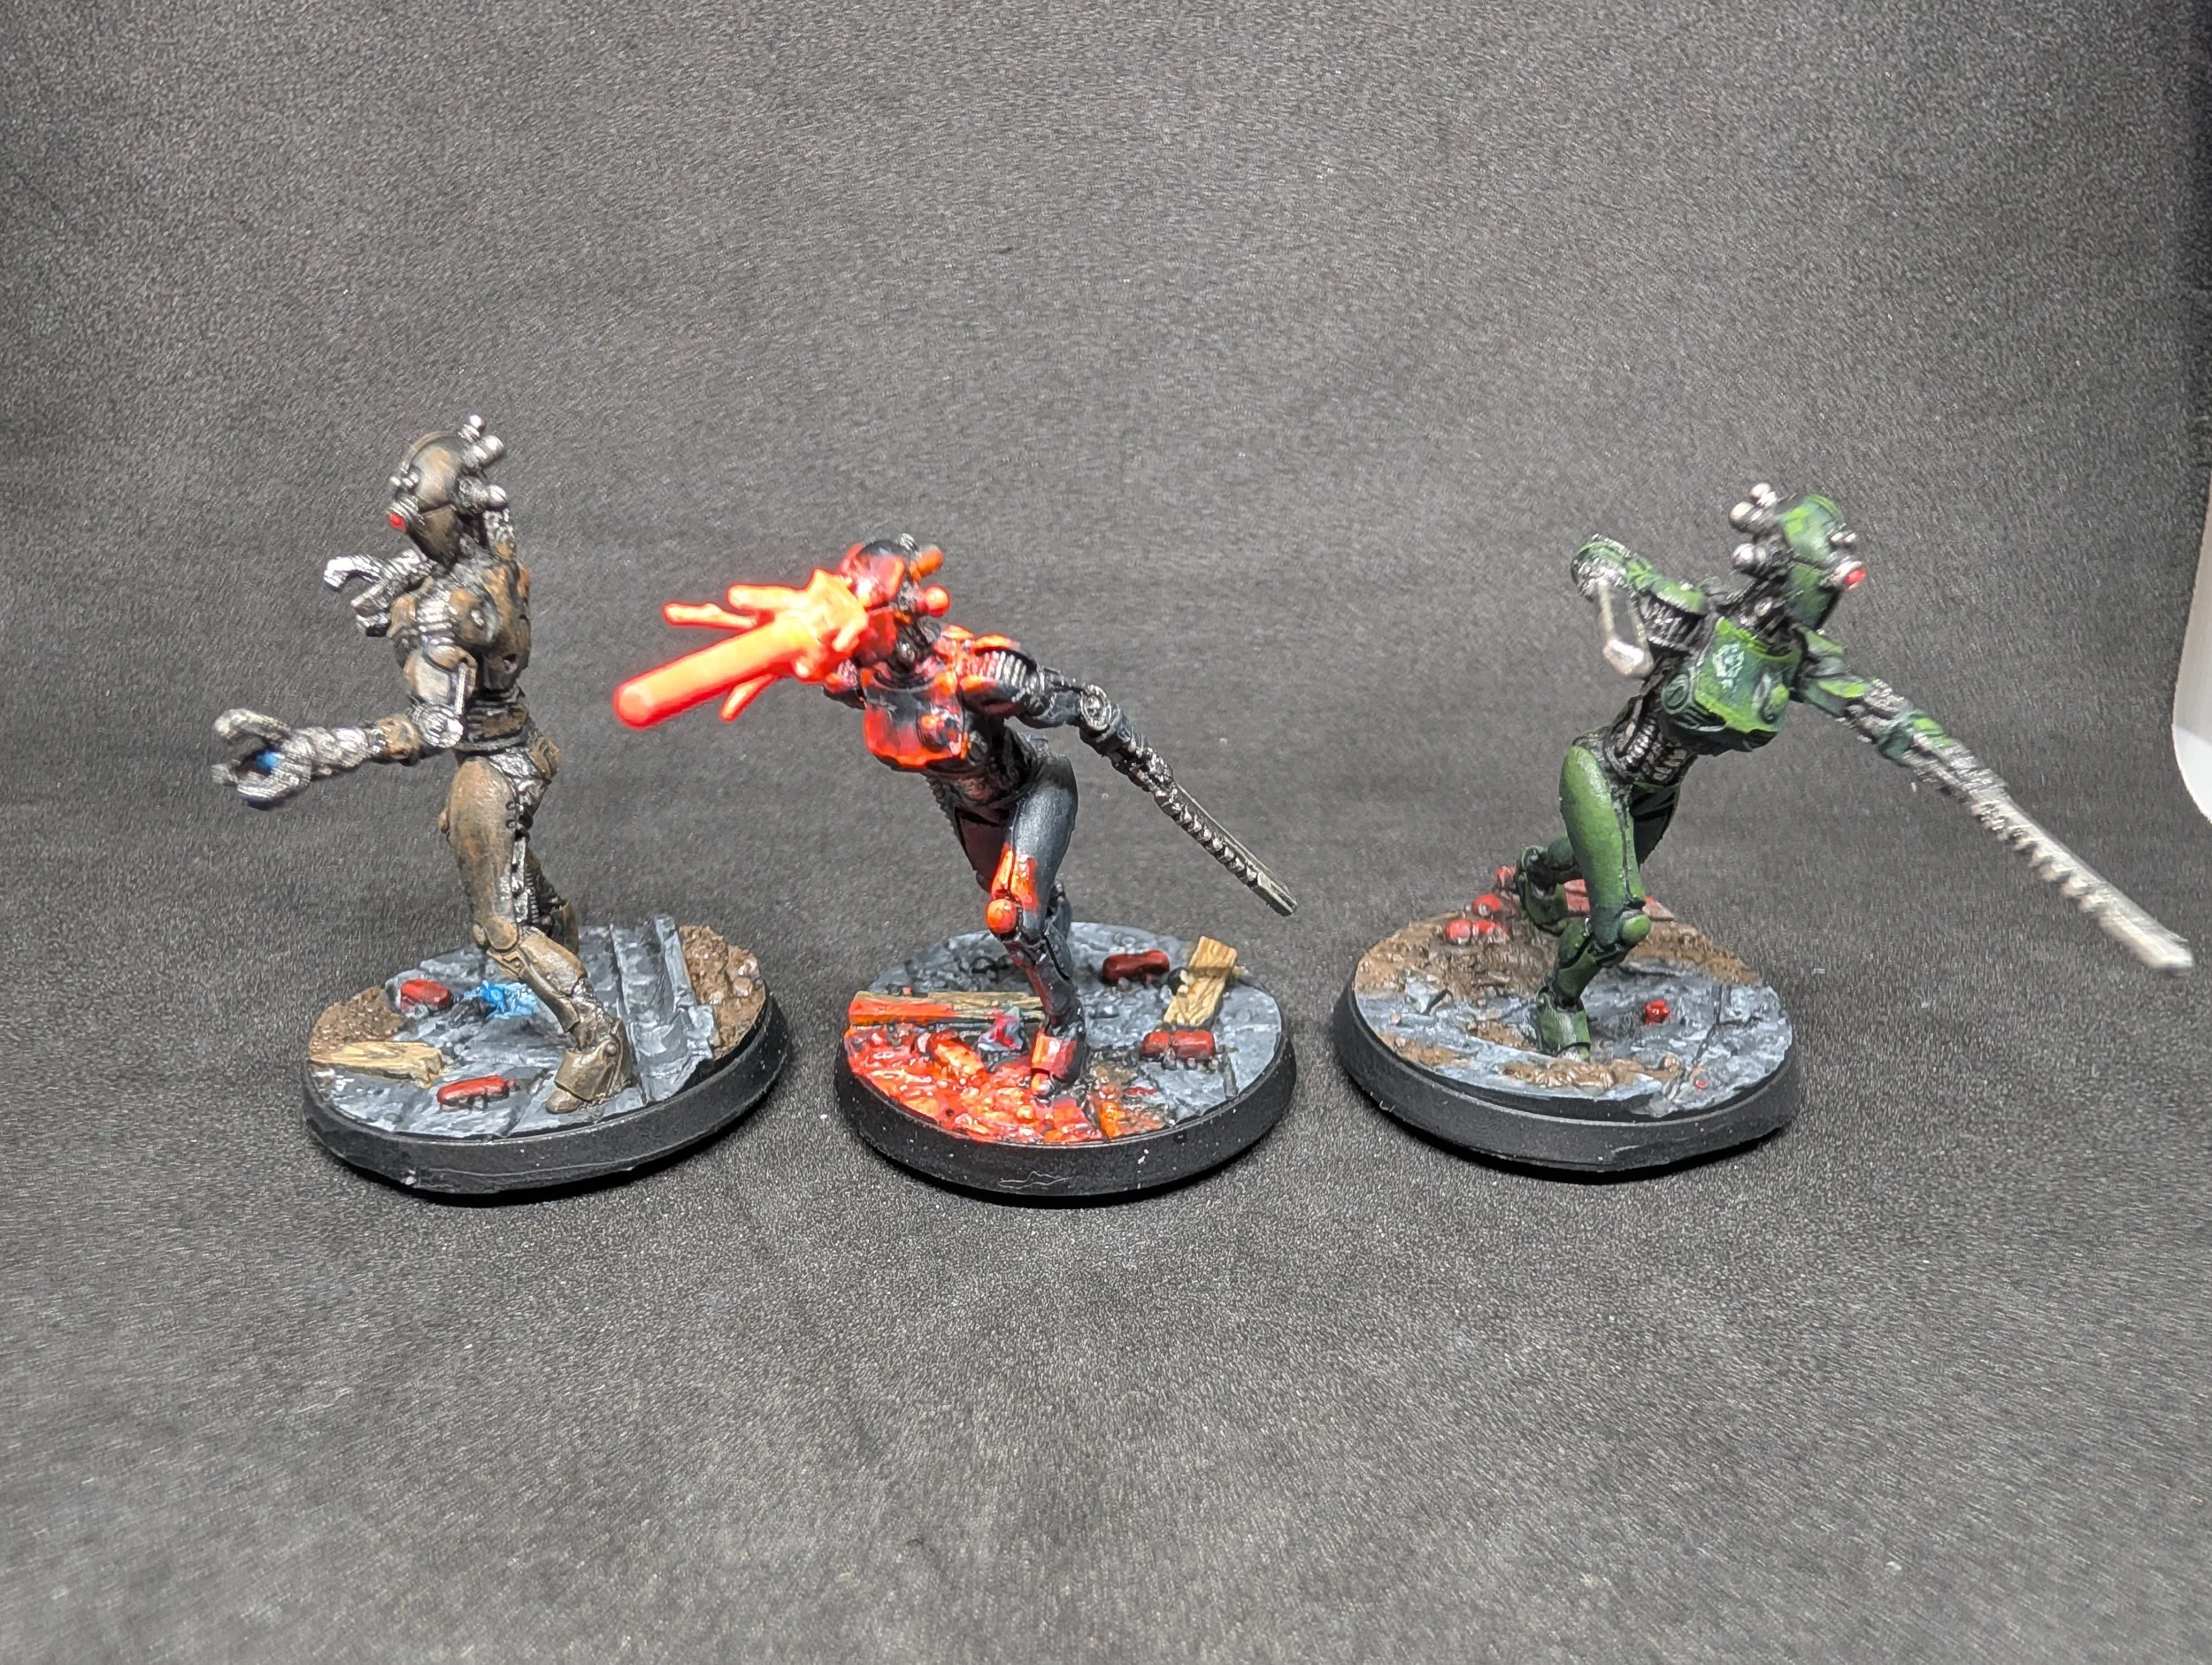
ASSAULTRONS!
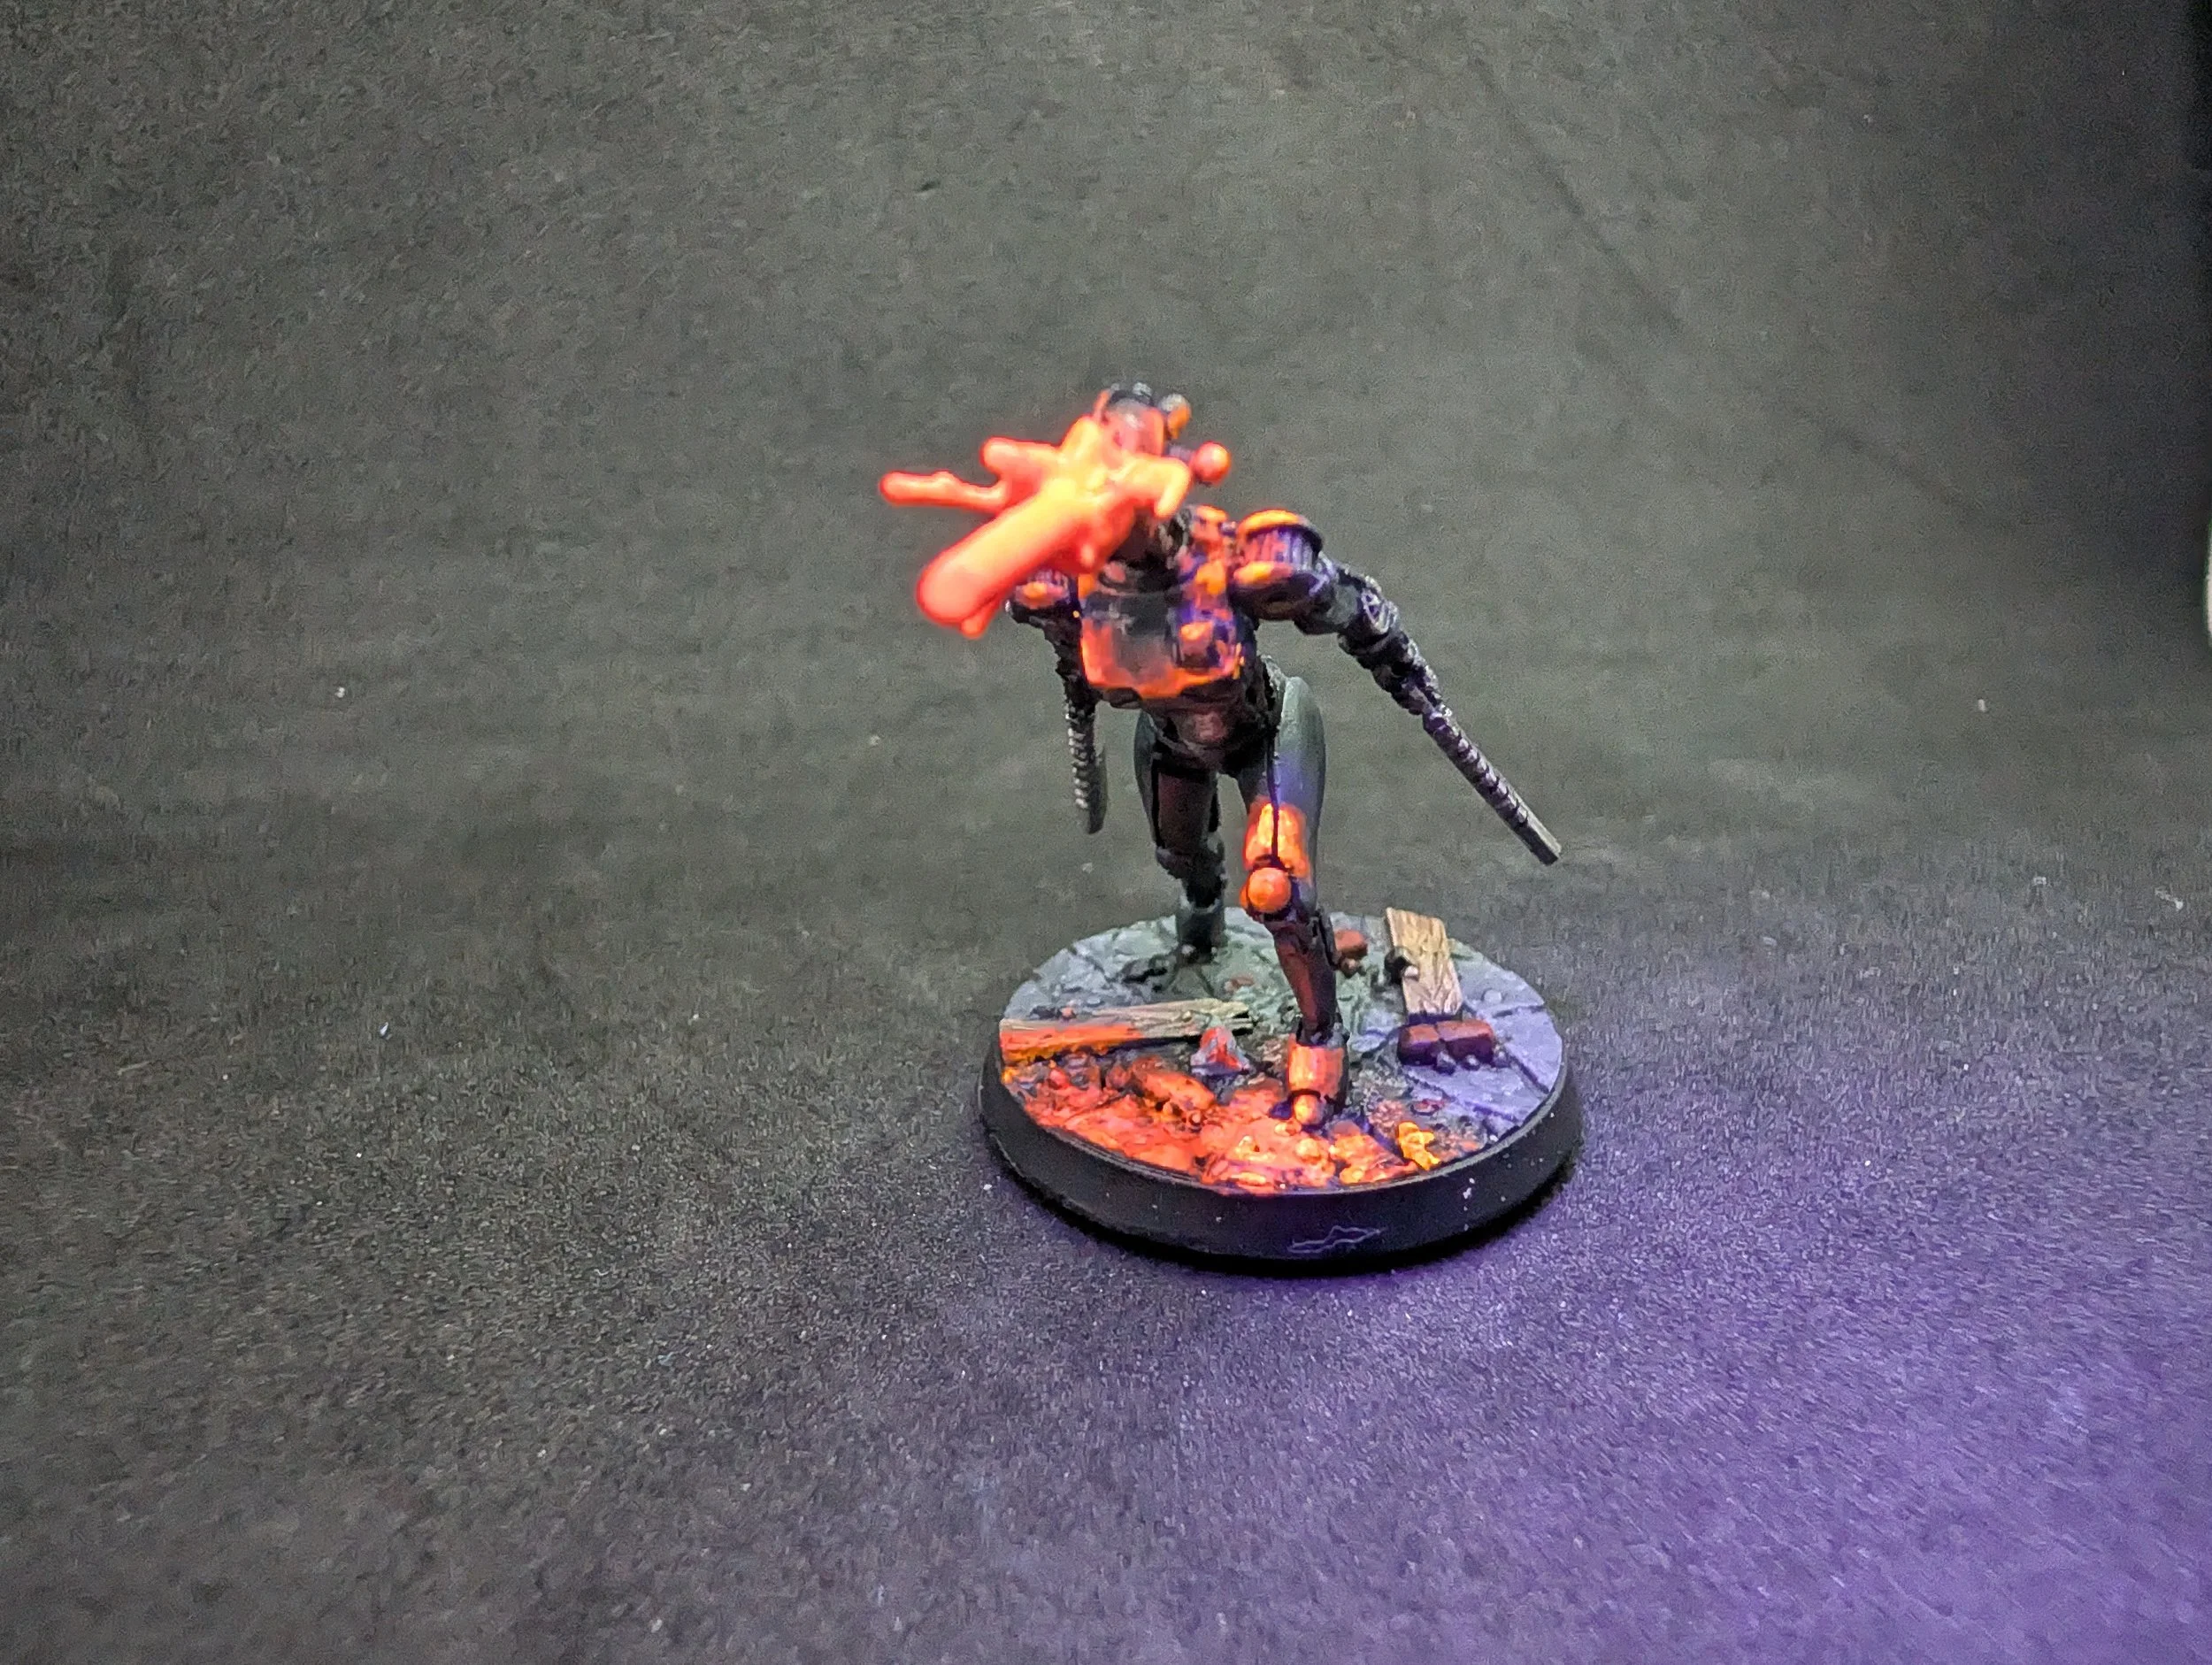
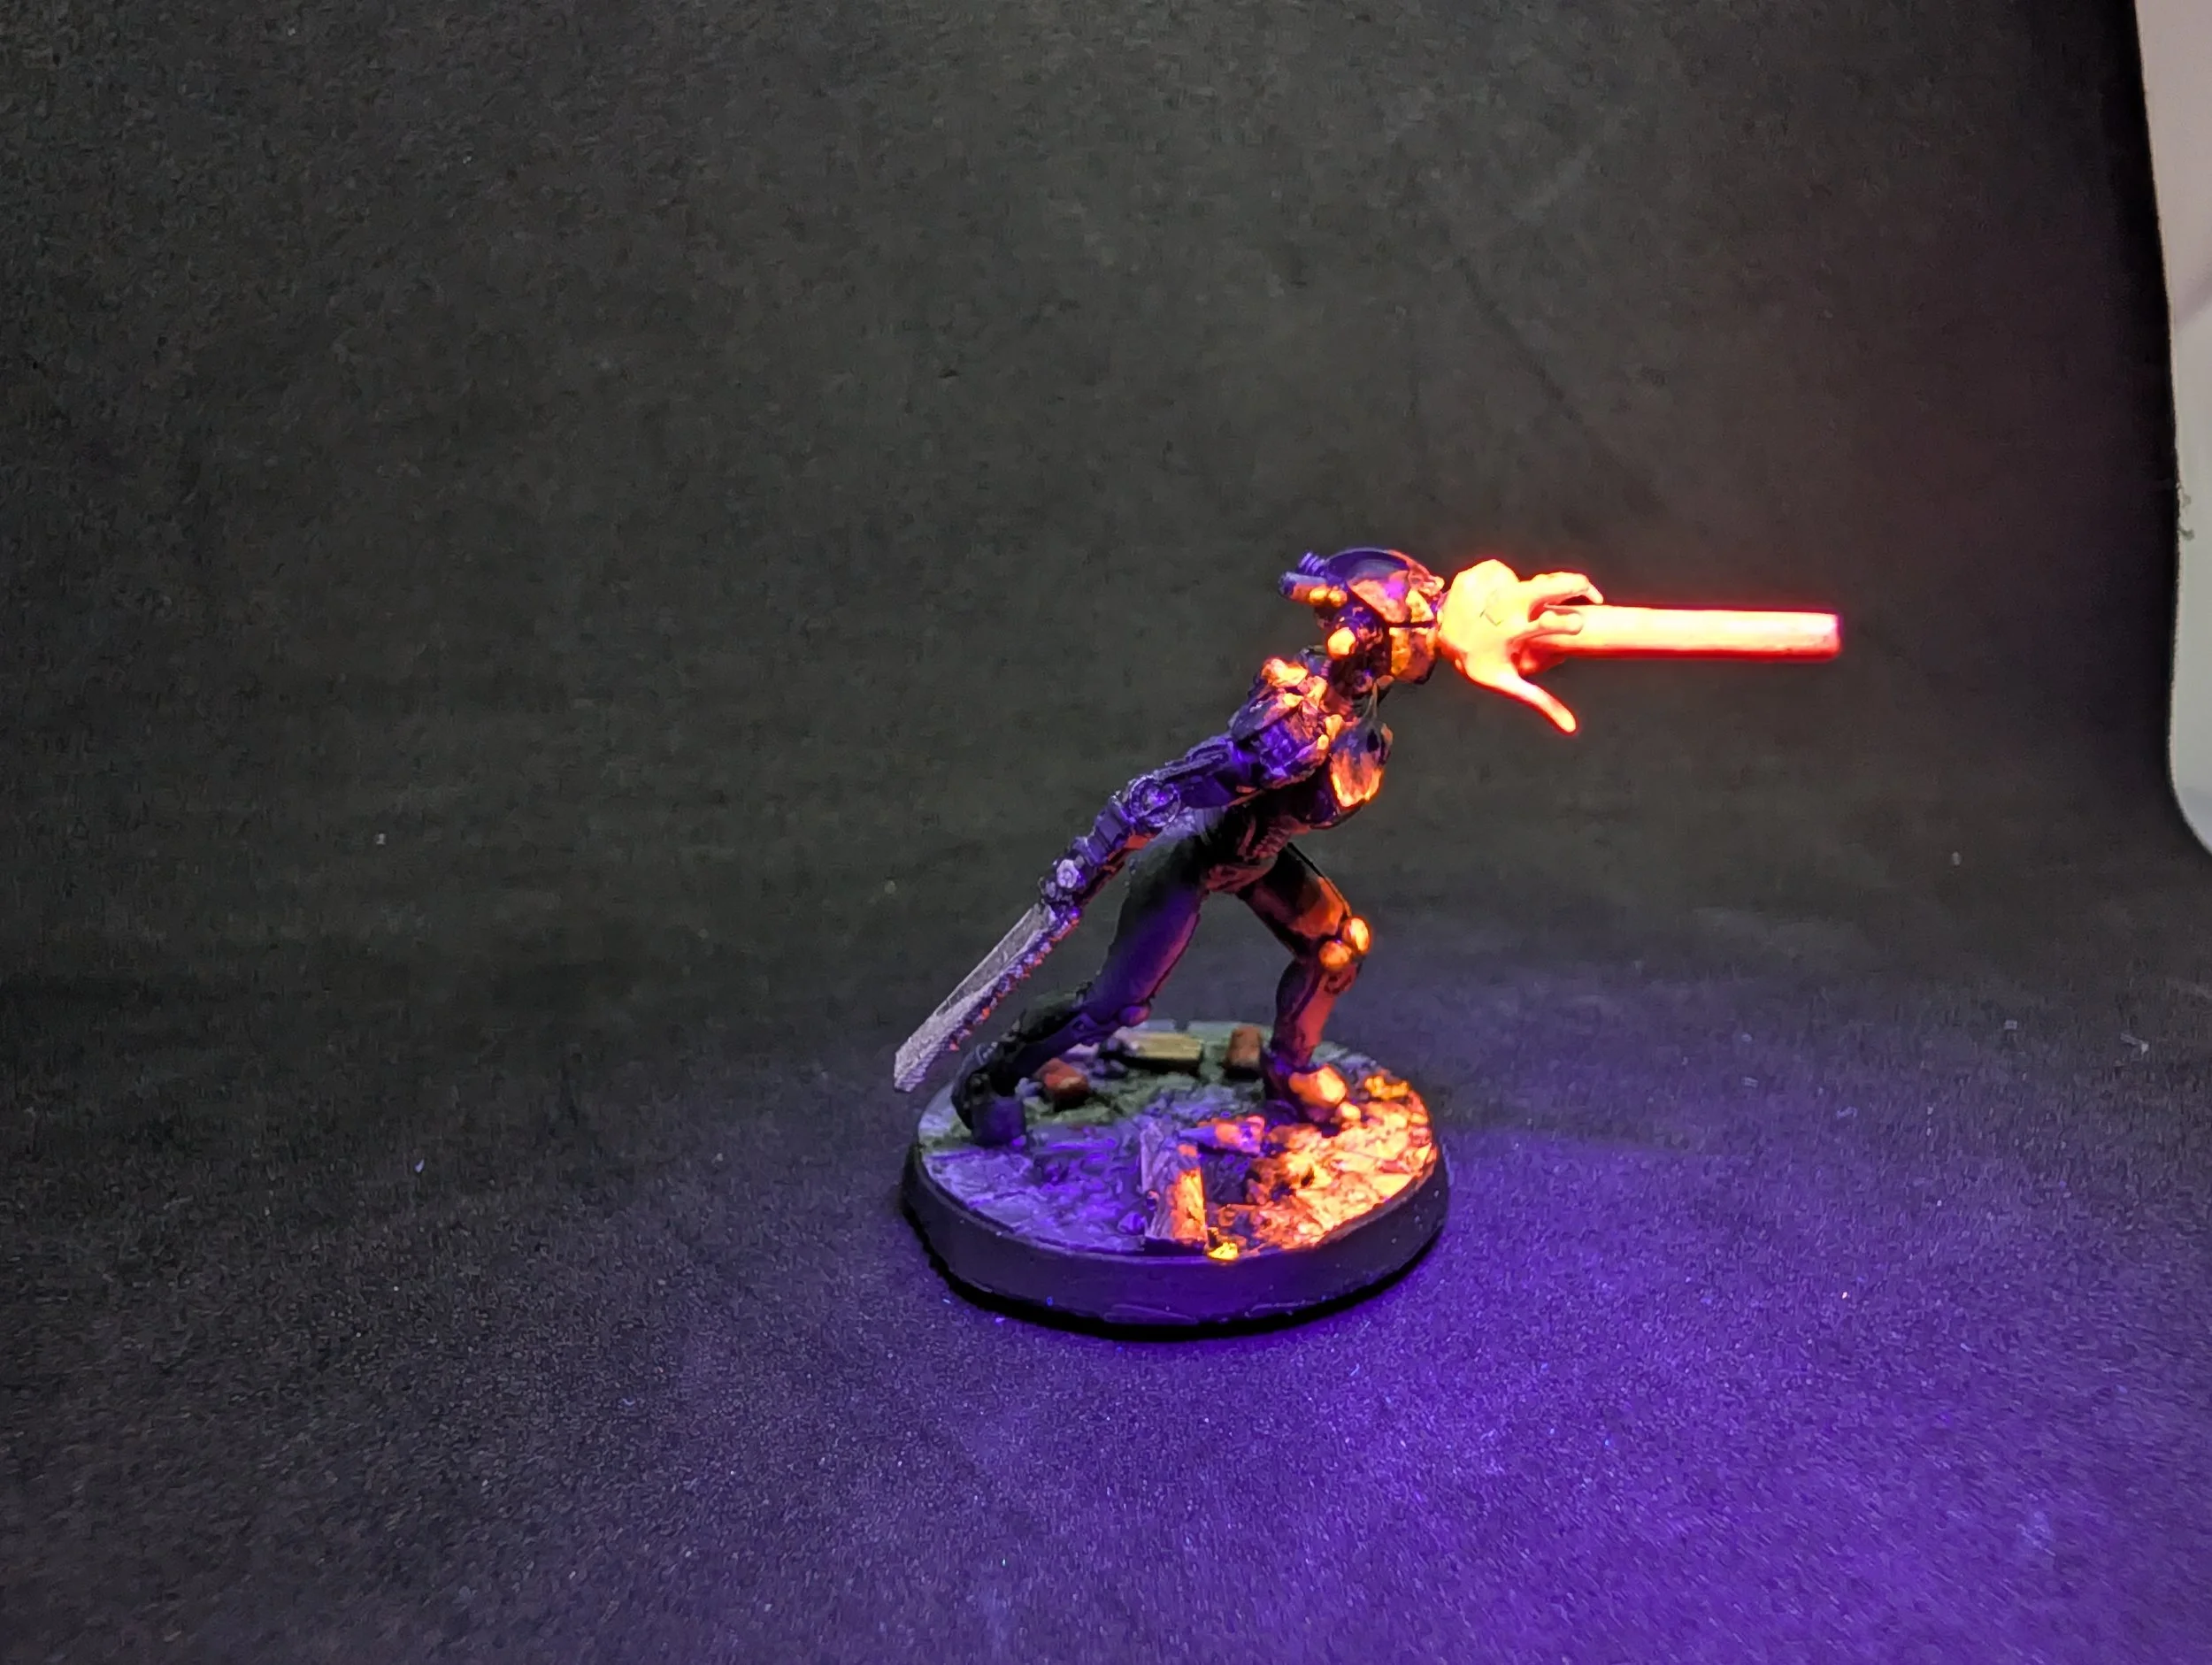
The Assaultron was introduced in Fallout 4, and we also get a sneak peak at a destroyed one in the first season of the Amazon Prime show, when Lucy leaves the Vault and goes in search of her dad and Moldaver. These are all also different colour schemes, with a US Army Protectron in a green/brown scheme, a Gunner Assaultron in Green and the Assaultron Dominator in black, which I went with to really ephasise the effect I added to the model. Now, if you have a set of the Assaultron models, you’ll notice that one of mine looks different. The Assaultron performing the devastating eye laser attack is definitely my crowning glory for the set. Originally, I just added the laser glow effect, but it didn’t look right. When the Assaultron uses the attack, there is a massive burst of energy emenating from the eye piece, and then the focused laser beam shooting out from it. The huge blast of light makes for a massively impressive image in-game, and I wanted to recreate that. I had kept a couple pieces of sprue, including a round one which made the perfect size for the eye of the Assaultron, by pure chance. I knew that was going to be the laser beam, so the next issue was that chaotic burst of energy. To create this, I used UV Resin and made a burst that I liked the look of. I was then thinking of just having it be removeable, but given how I didn’t like the look of the effect without the laser burst, I decided that it looked better with the laser always attached. I used my pin vice to add a small notch to allow the blast to have plenty of surface area to glue on to by having the eye piece sit inside, and it makes the blast look like it’s really emanating from the eye piece and engulfing the area around it. The dark colour scheme really enhances the light effects, and on the Nuka Cola bottle, I tried to recreate a light refracting effect on the glass. And since I used Fluorescent paints, the colours are really bright and pop well, but under a UV light, they truly glow and make the effect look so much cooler, and is emphasised even more by the dark scheme.
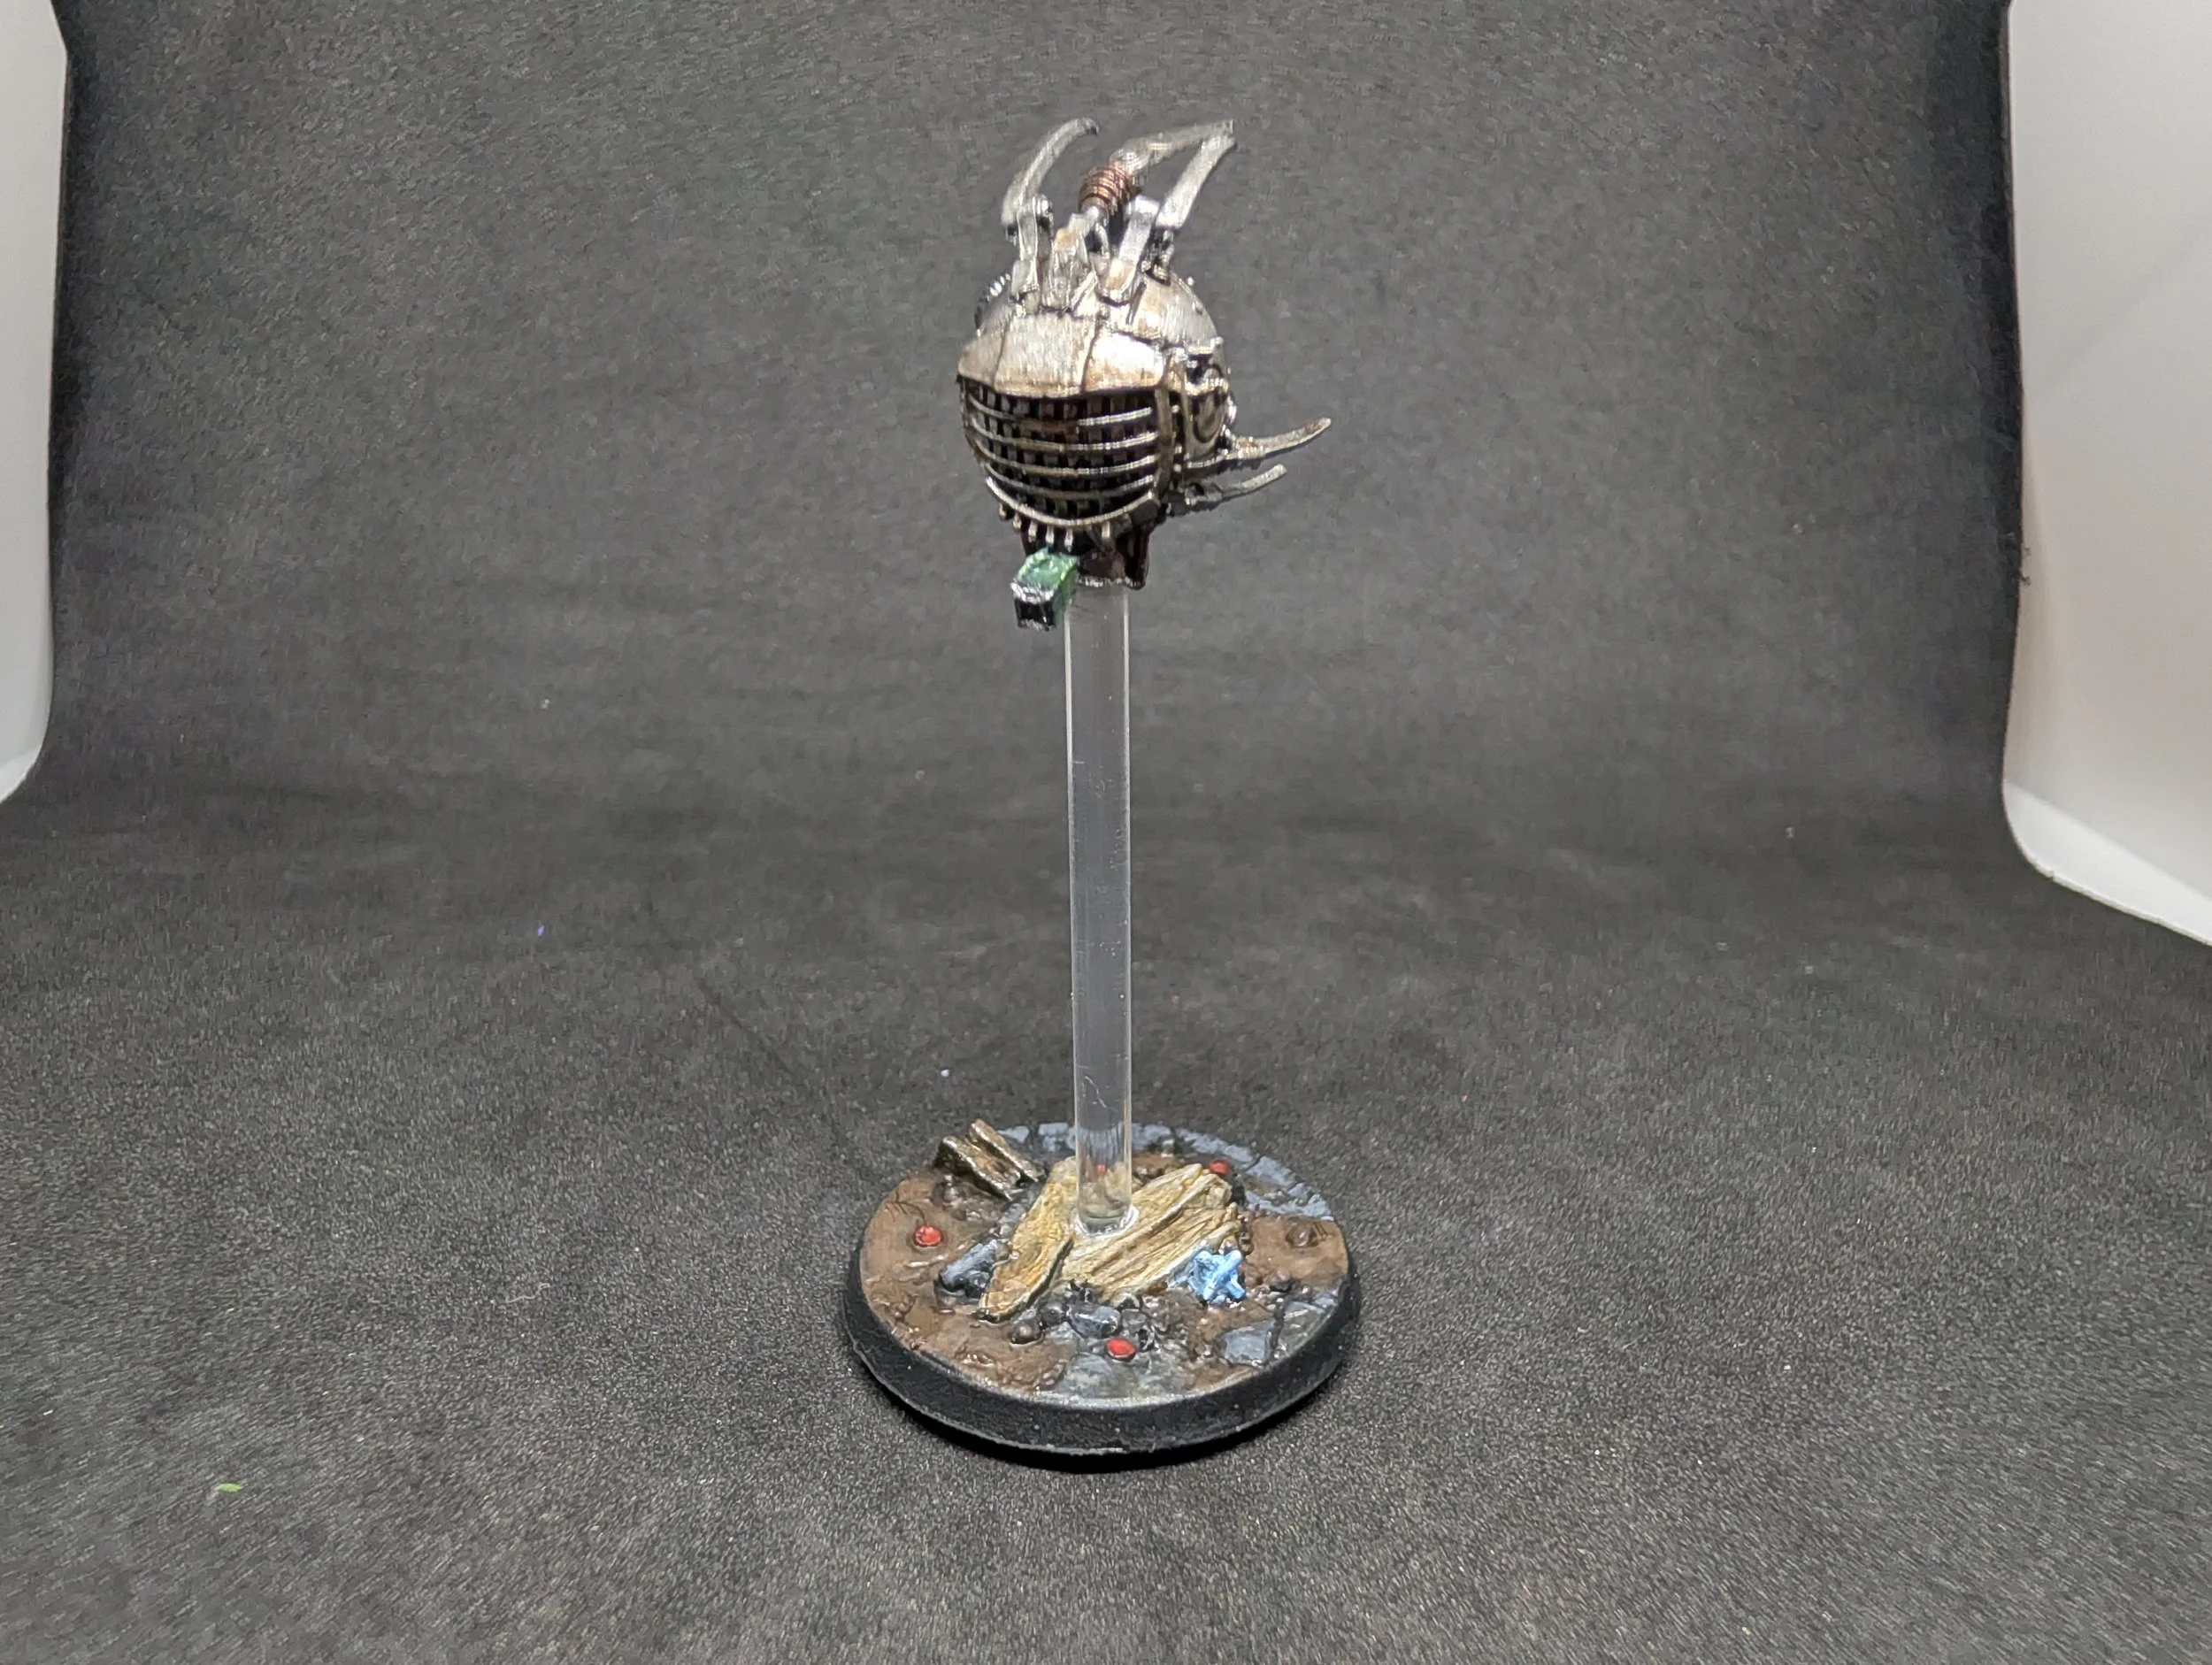
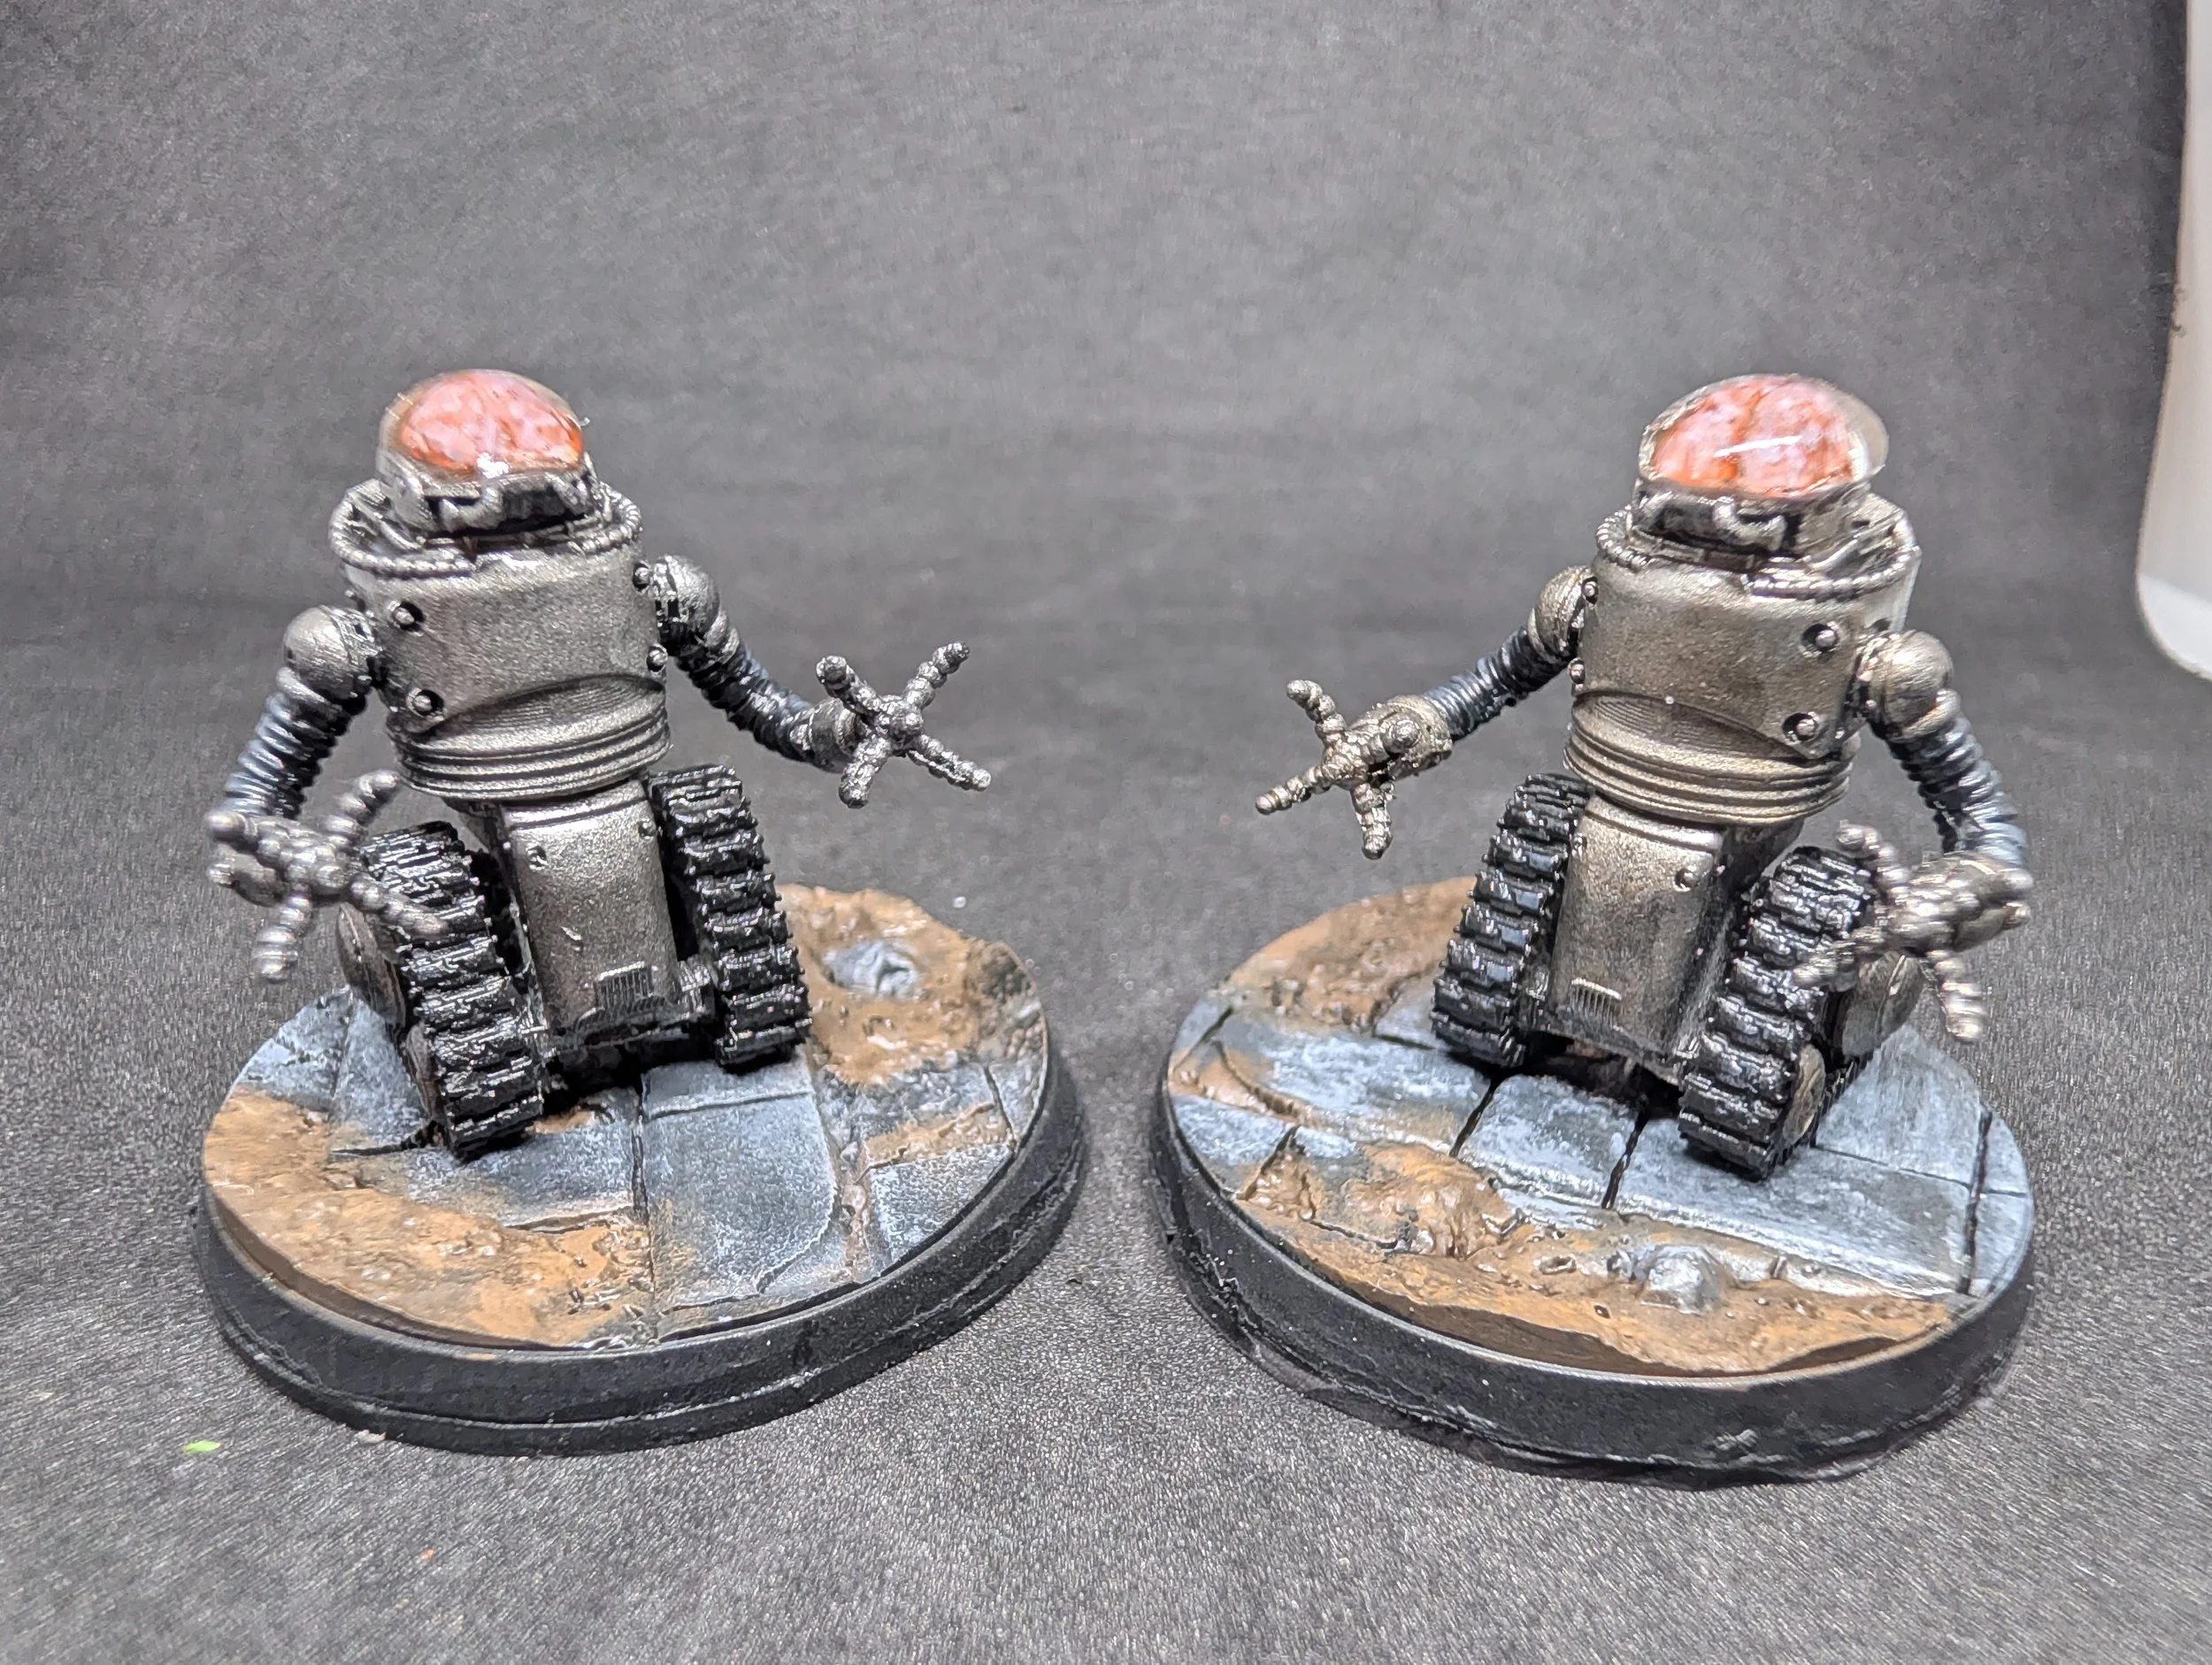
EYEBOT! ROBOBRAINS!
This Eyebot comes from a Brotherhood of Steel kit, and I’m thinking about getting the set of them, just to add some more cool looking Eyebots to the table. I also completed the Robobrains which again, you may notice look different to yours. Originally, they have a solid dome over the brain case, but I took a rotary tool to mine to remove them. You see, I had an idea of adding REAL BRAINS to them! Okay, not REAL brains… but model ones, and I had to utilise some Minimould from TTCombat, a handy reusable set of plastic balls that you pour hot water on and melt together before pressing bits into to make moulds, which let you use putties to create copies of the tools. However, UV Resin heats up too much and melts the plastic as it cures, so don’t use that. I use Green Stuff. And to make the impression of the brain, I used Mantic Games’ Mars Attacks Martians, as they are sized PERFECTLY for this job, and have great detail on them. After painting them, I use UV Resin to create the dome, simply cover the brain in the resin, cure it, then if you want to fill out the dome shape more, you can carefully add more if needed, and the resin adheres to itself without visible layers. A gloss varnish over the dome to complete the model protects the resin, and keeps a glass-like shine.
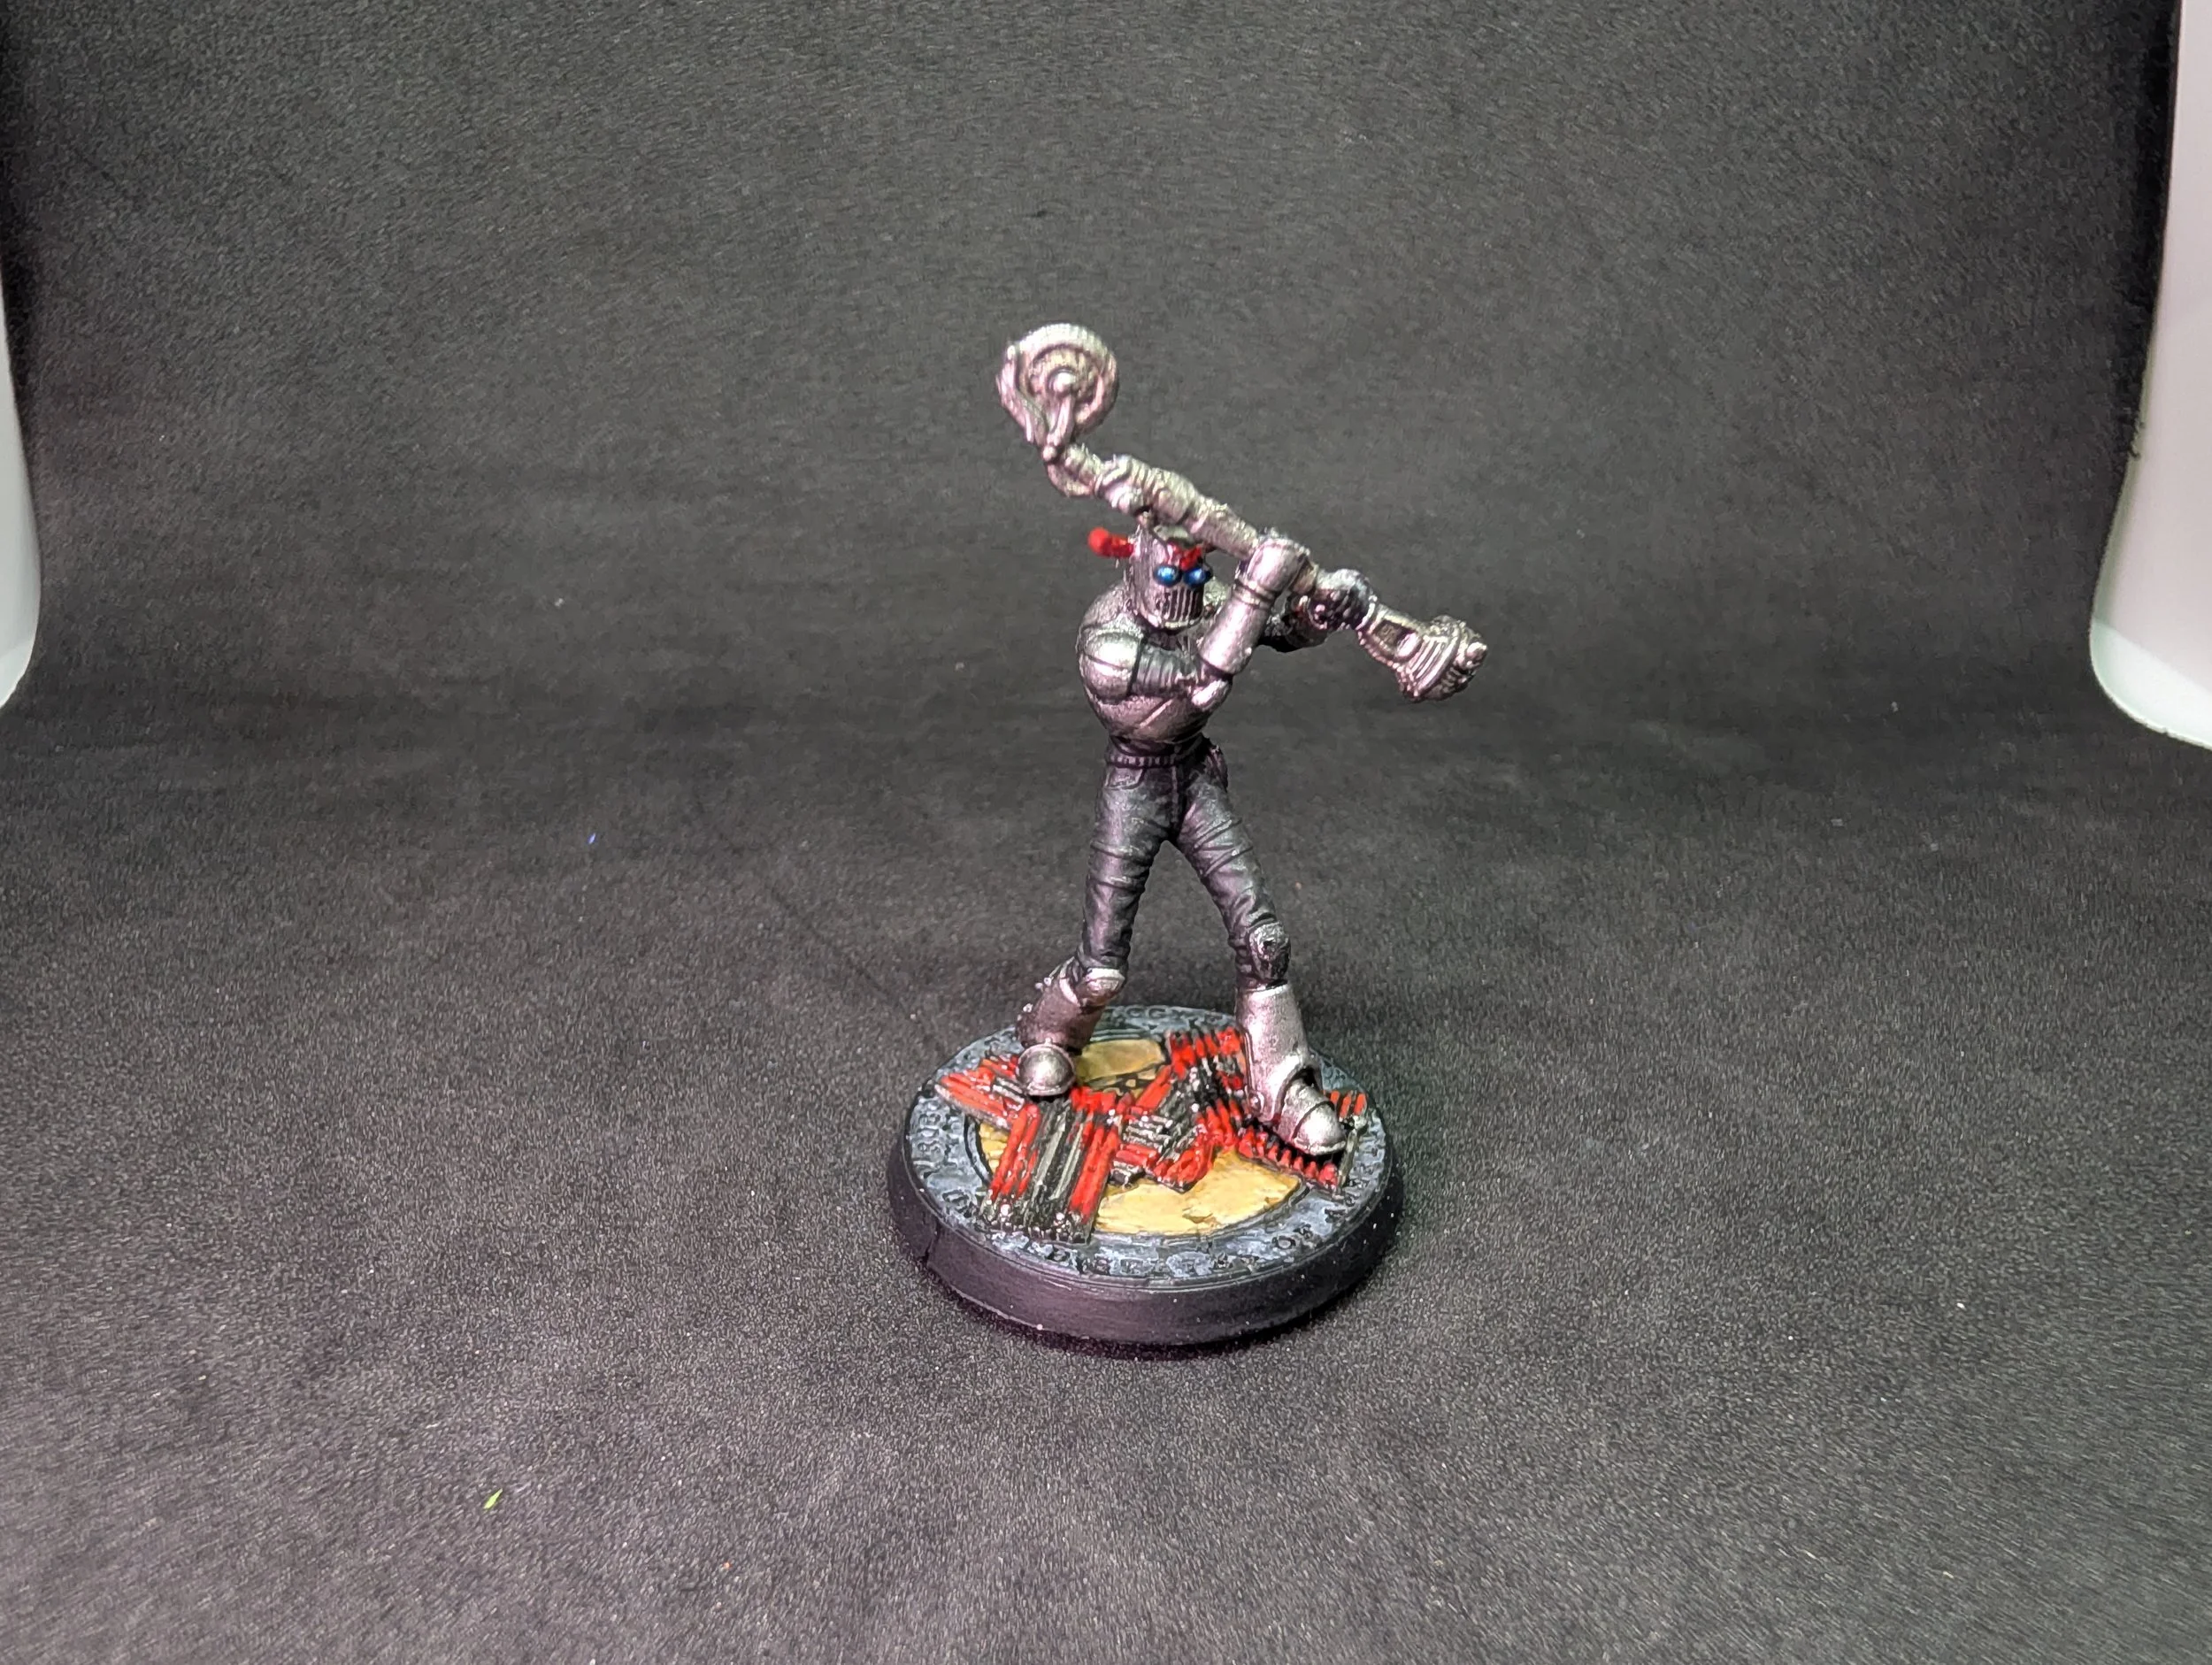
THE MECHANIST!
In the Automatron DLC for Fallout 4, which I’ve named this month’s theme after, the main antagonist is The Mechanist, a character from in-universe comic books, and a character we see in Fallout 3, who is fighting it out in Canterbury Commons. Fallout 4 introduces a new alter-ego for the would-be hero who commands a never-ending army of custom robots, and is a must have model to paint in this themed month! And in game, The Mechanist is allowed to be a leader for an army of robots!
TURRETS!
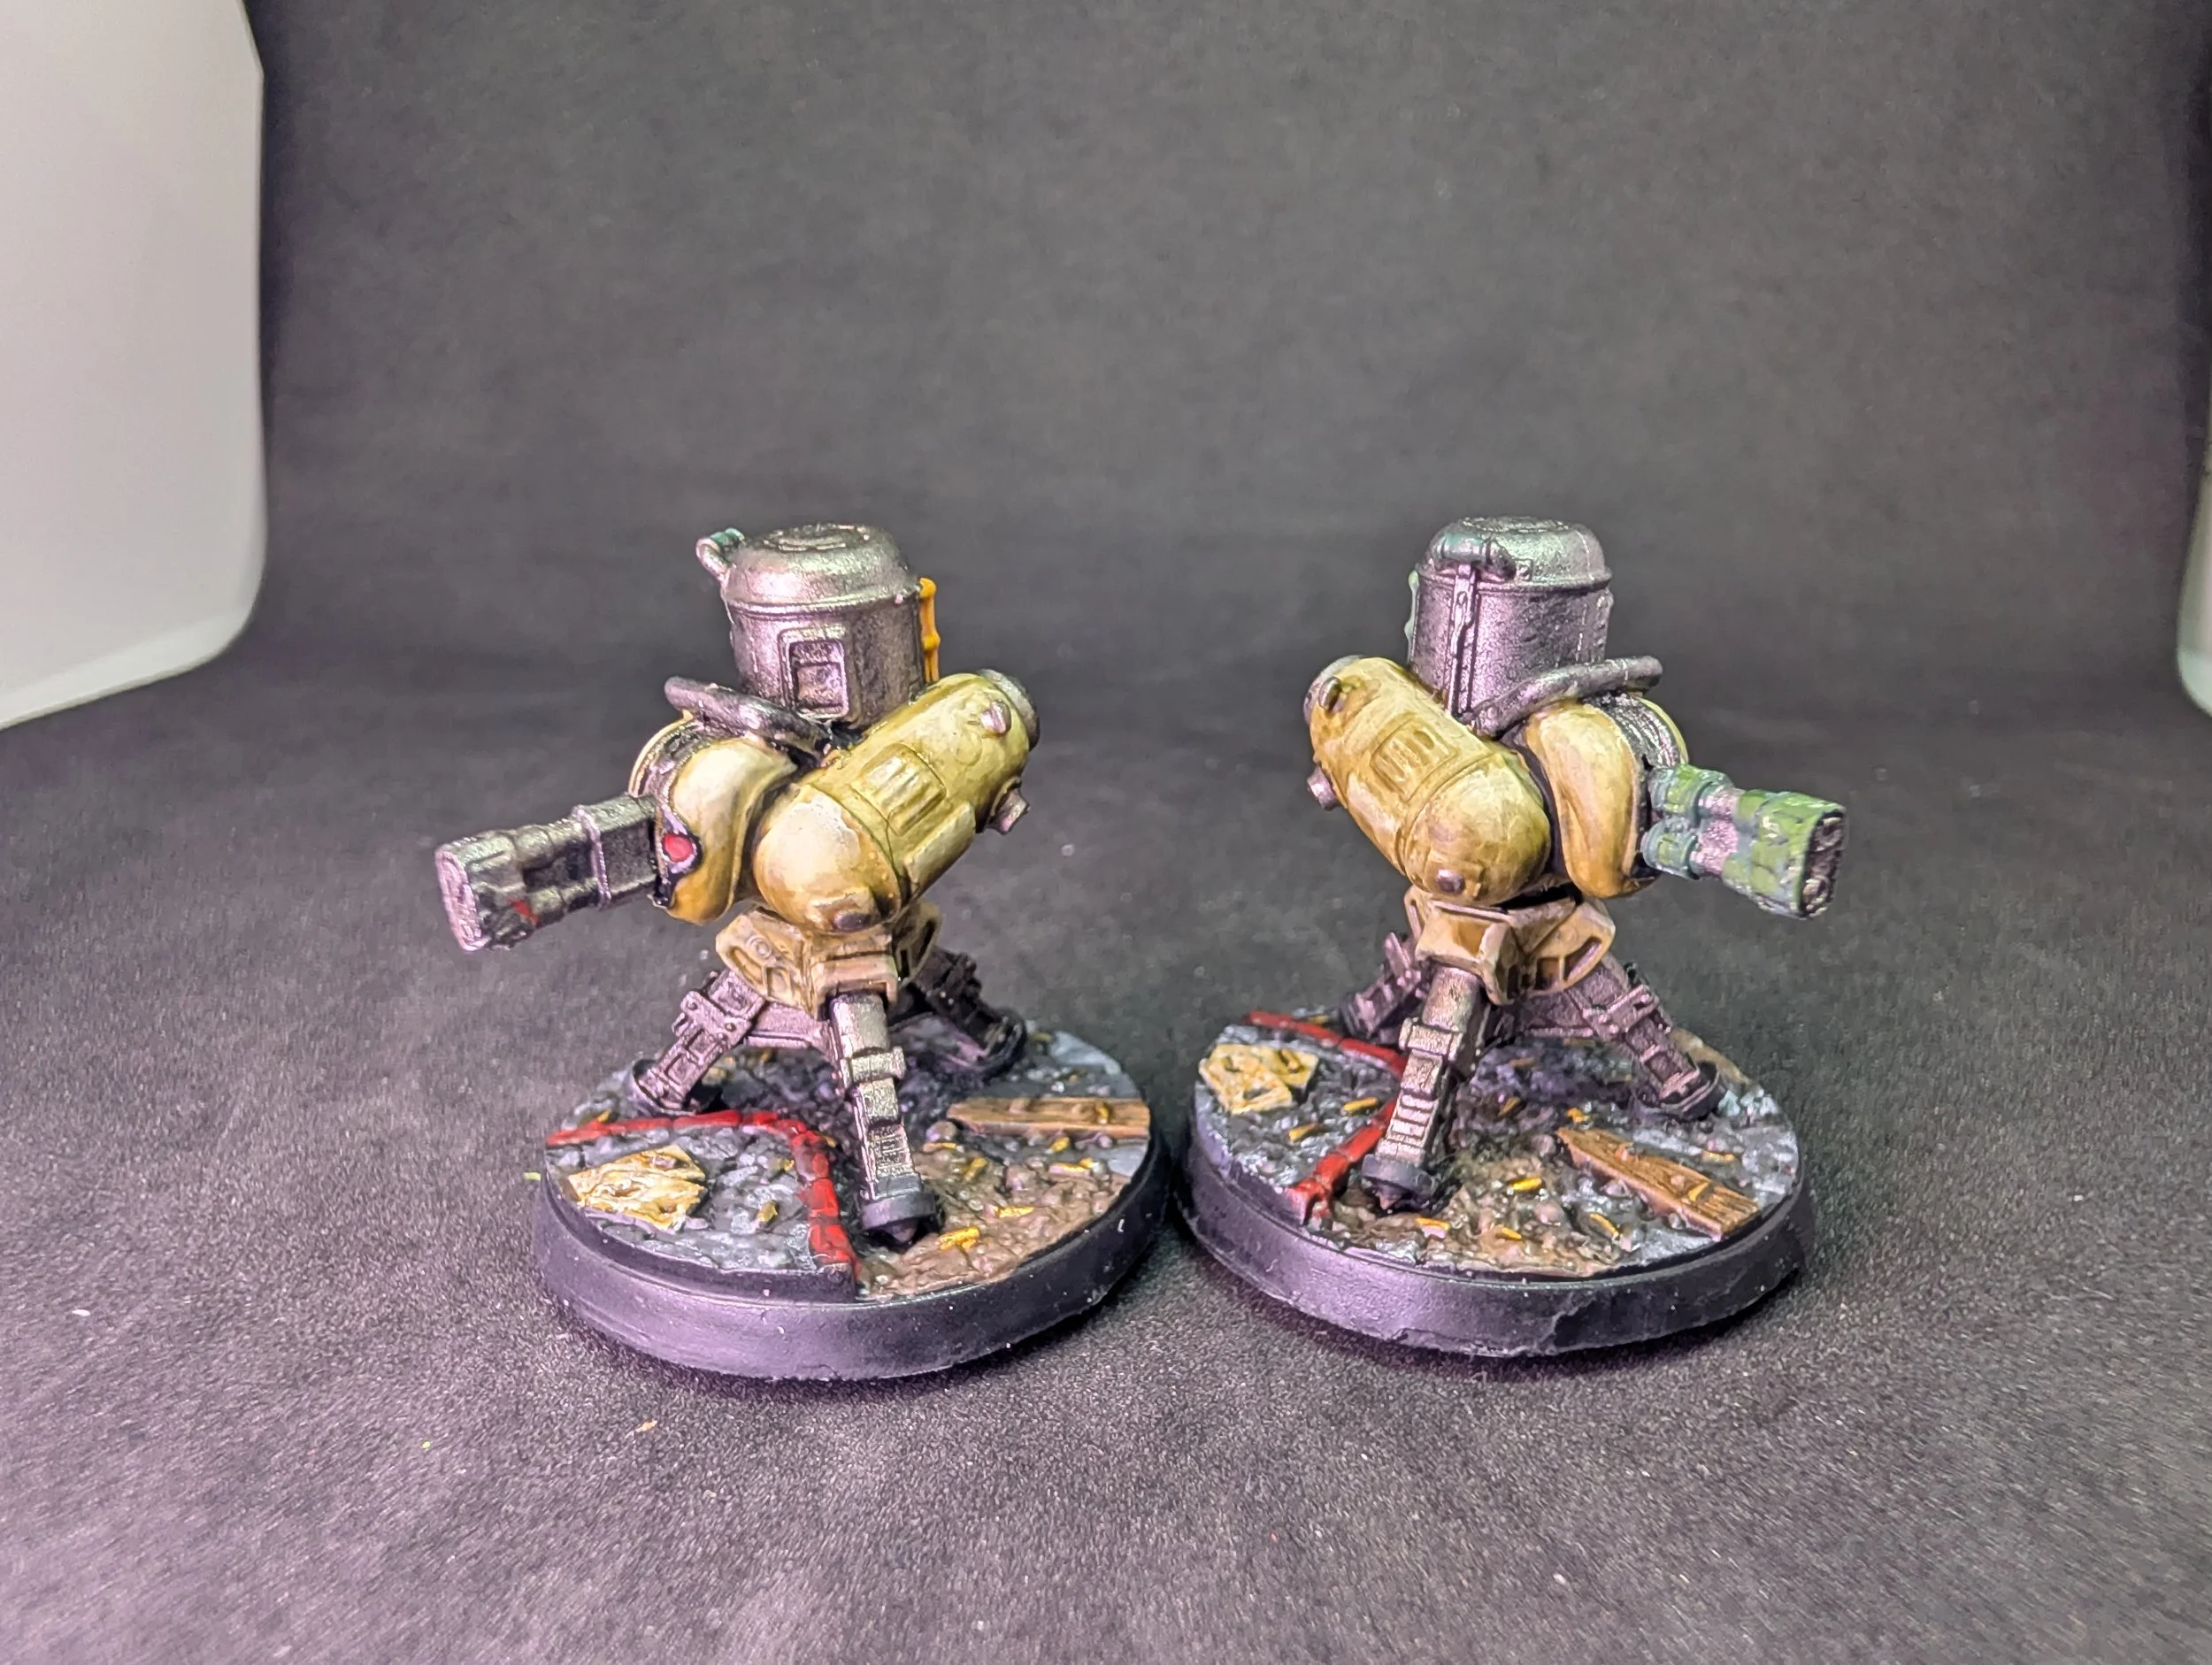
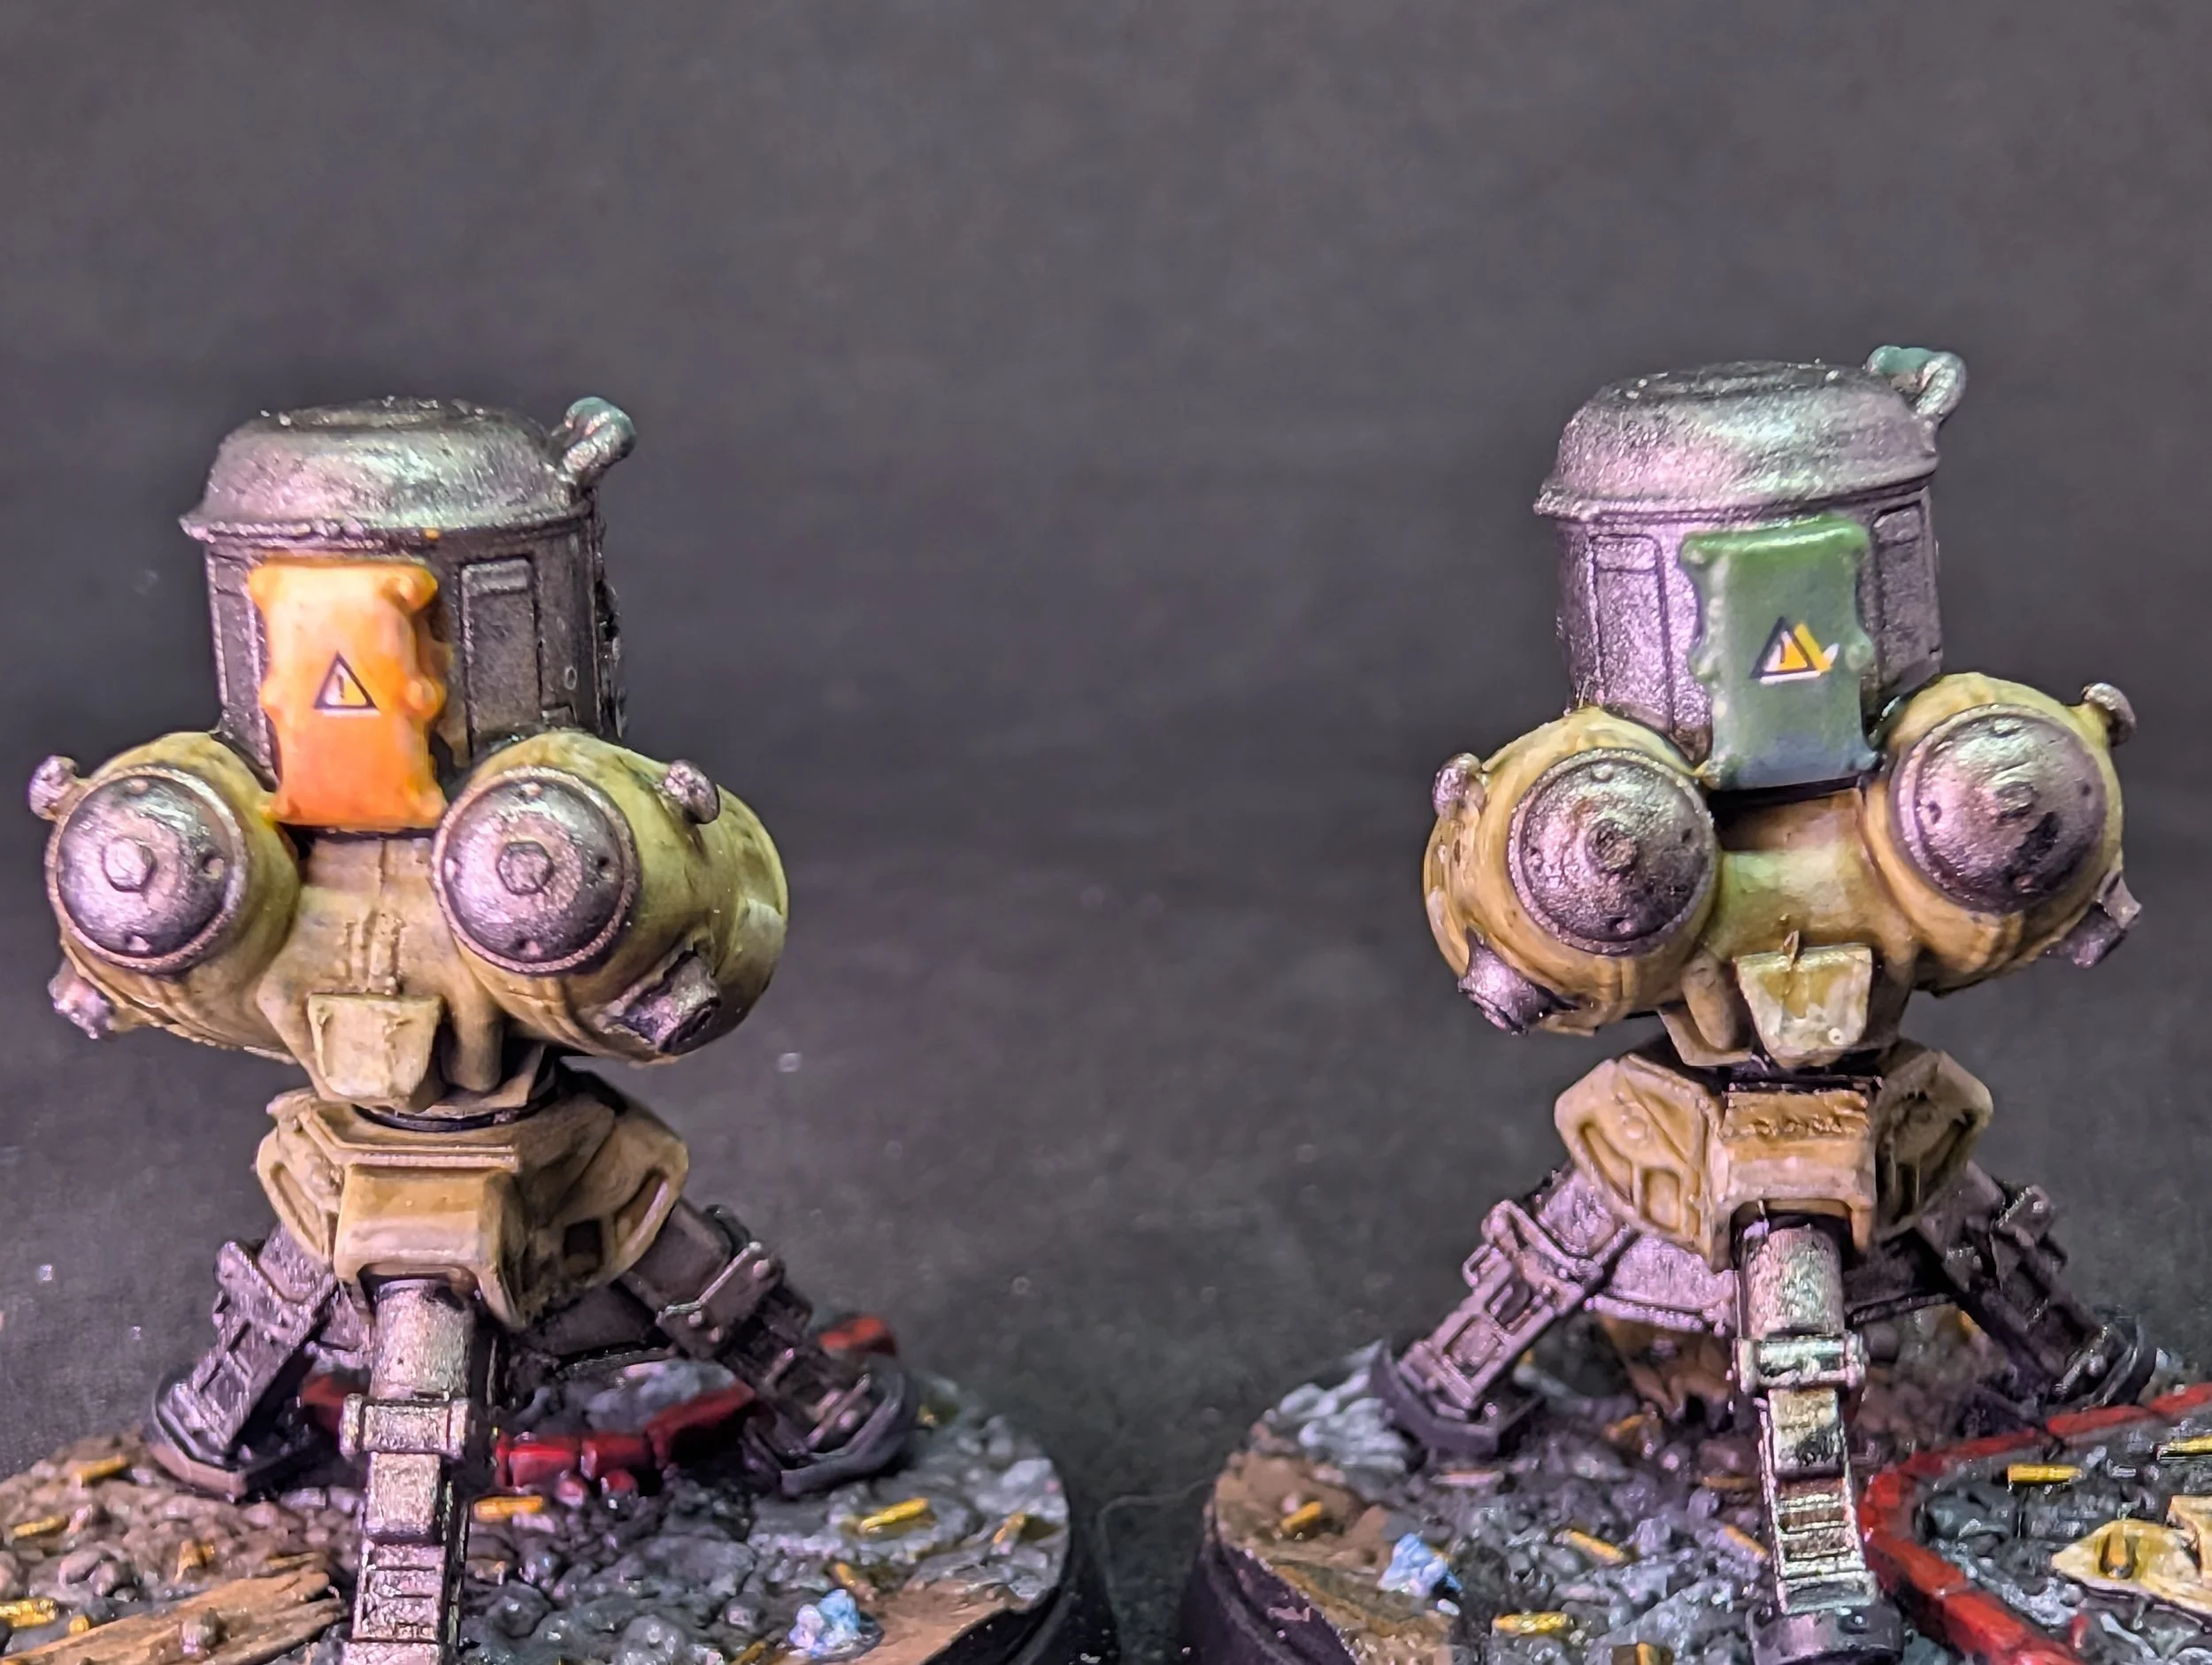
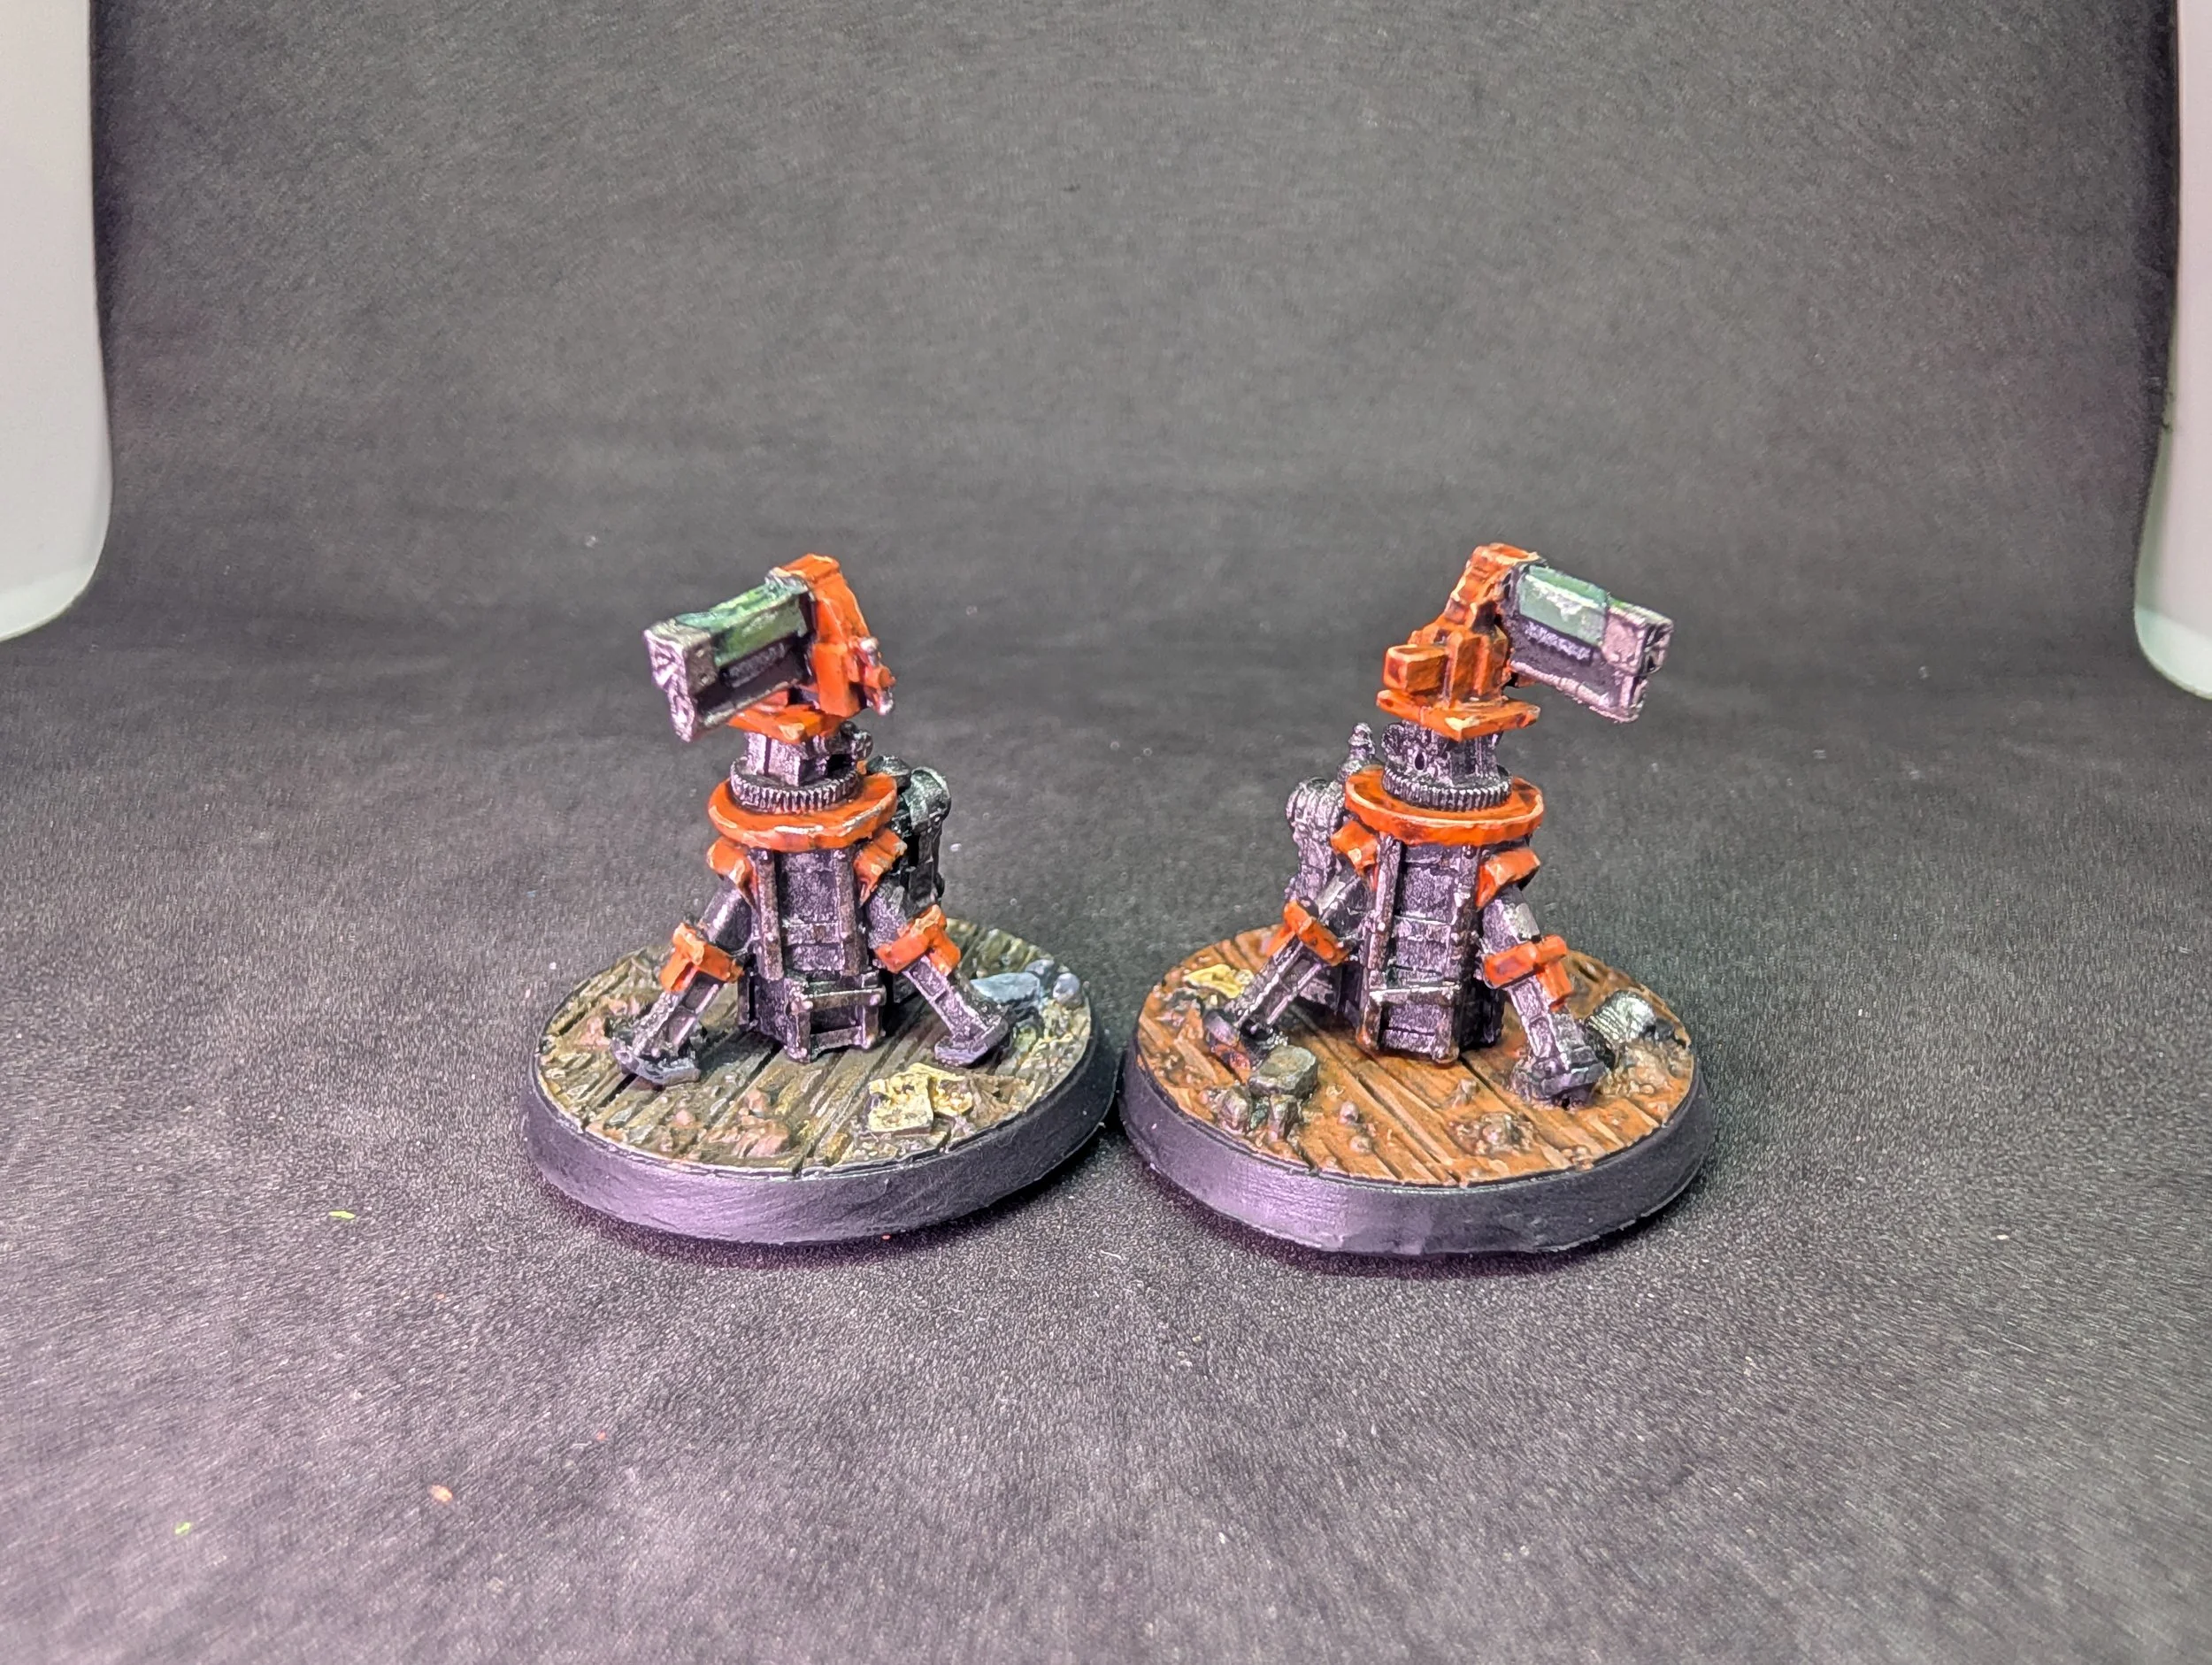
The turret set contains two Machinegun turrets and two laser turrets, although I was very tempted to make one a Rocket turret using a spare missile launcher from a Raider kit, but kept them as lasers. These are nice little kits, and have the opportunity to add some nice bits of colour to them, like the Vice and structure of the laser turrets being a bright orange, and the light olive green of the motors on the machine gun turrets. Taking that further, I added some more colour on the shroud of one of the turrets, and different coloured cases on the wire boxes behind the large magazines. I also included a couple hazard sign transfers from the Kasrkin Killteam set for Warhammer 40K/Kill Team.
THE INSTITUTE!
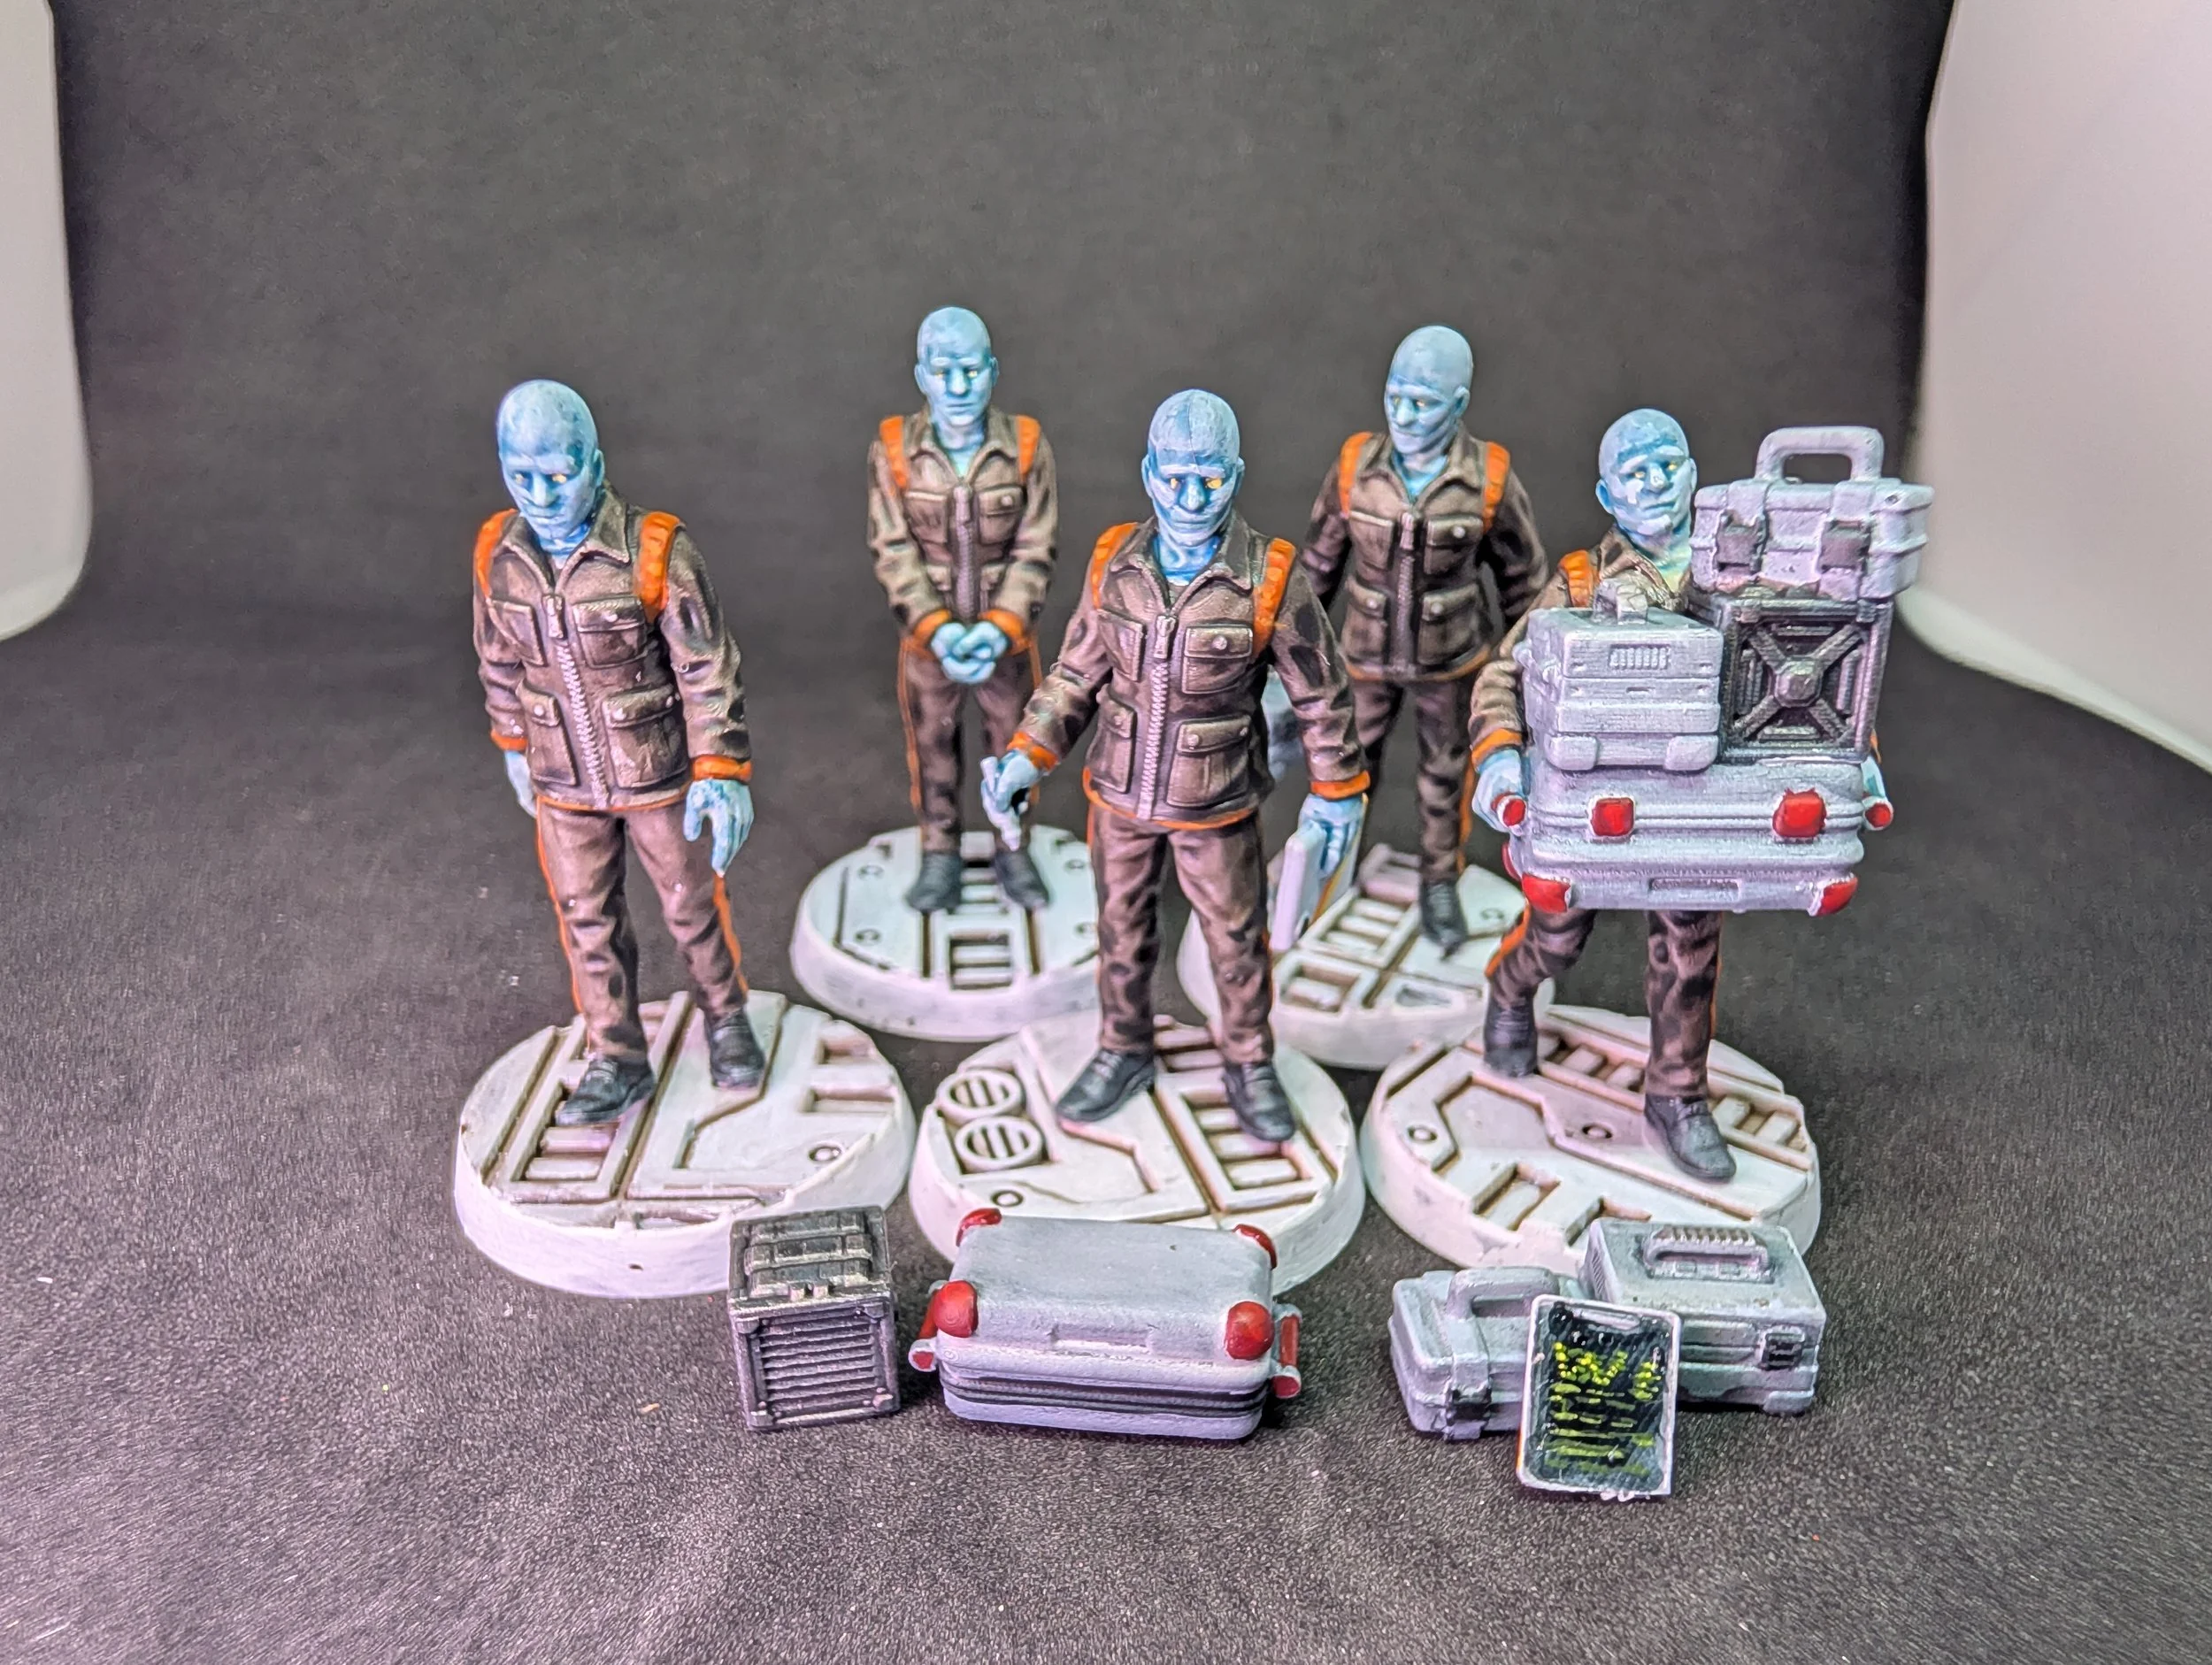
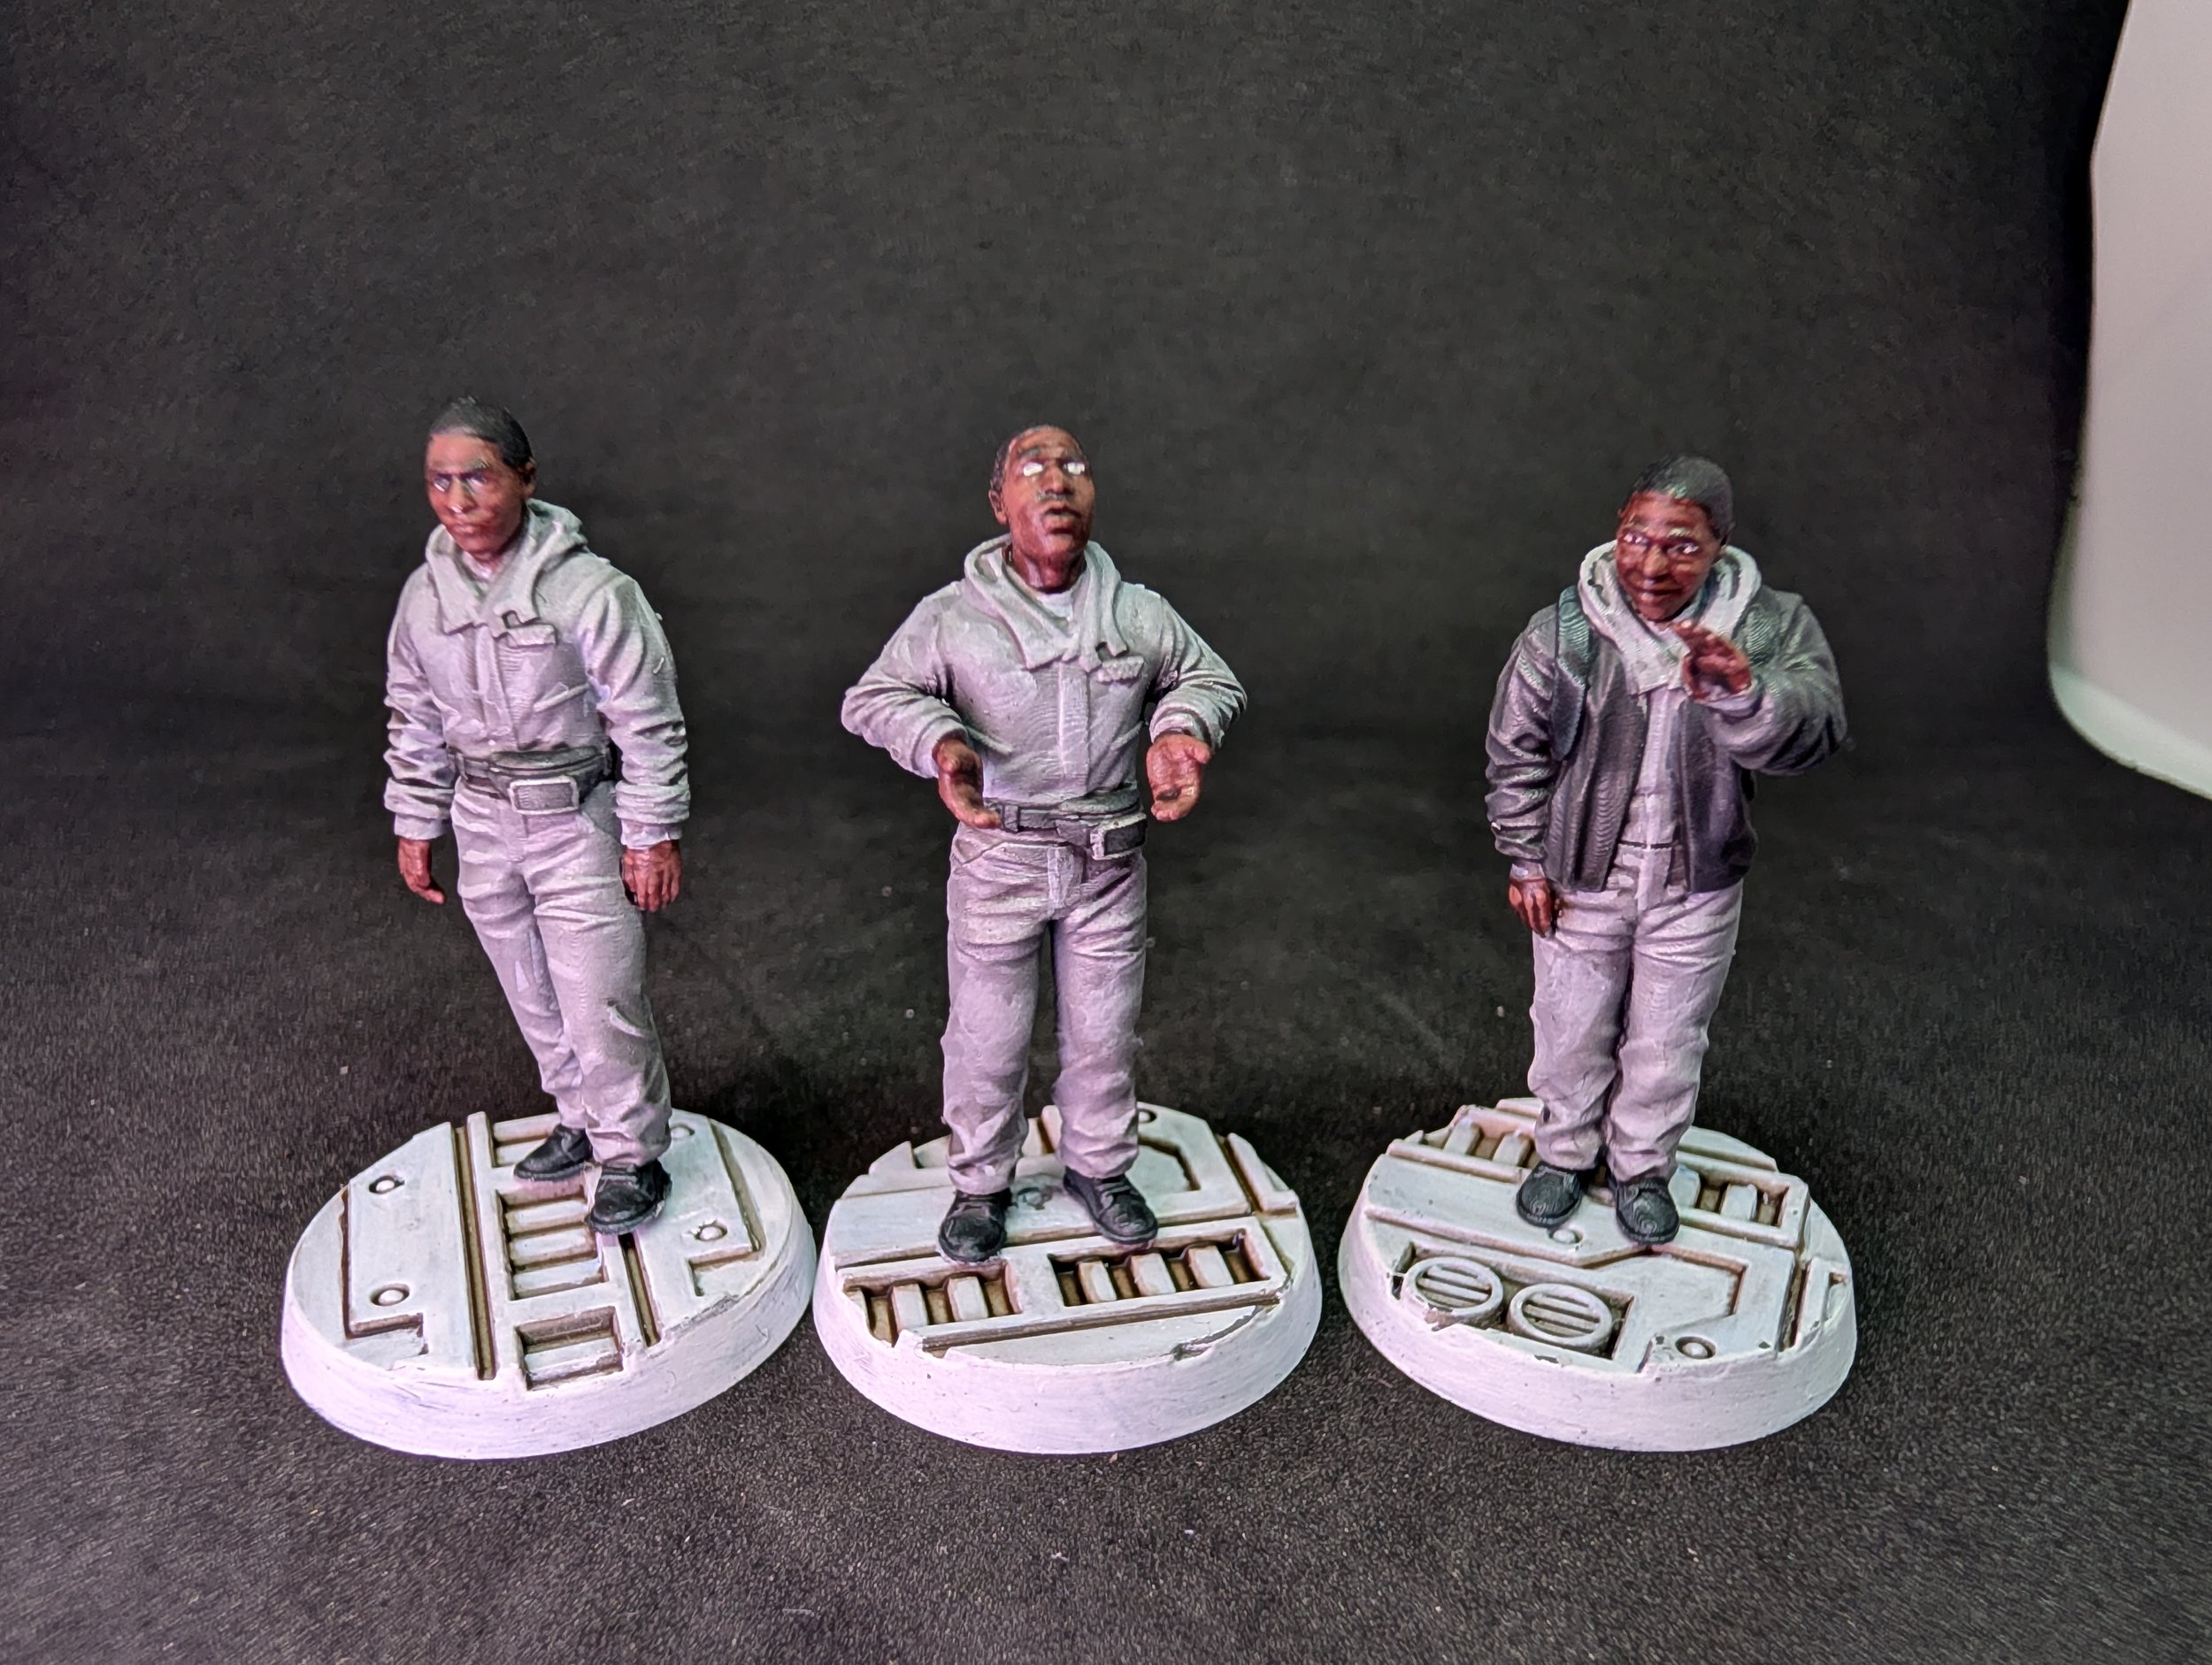
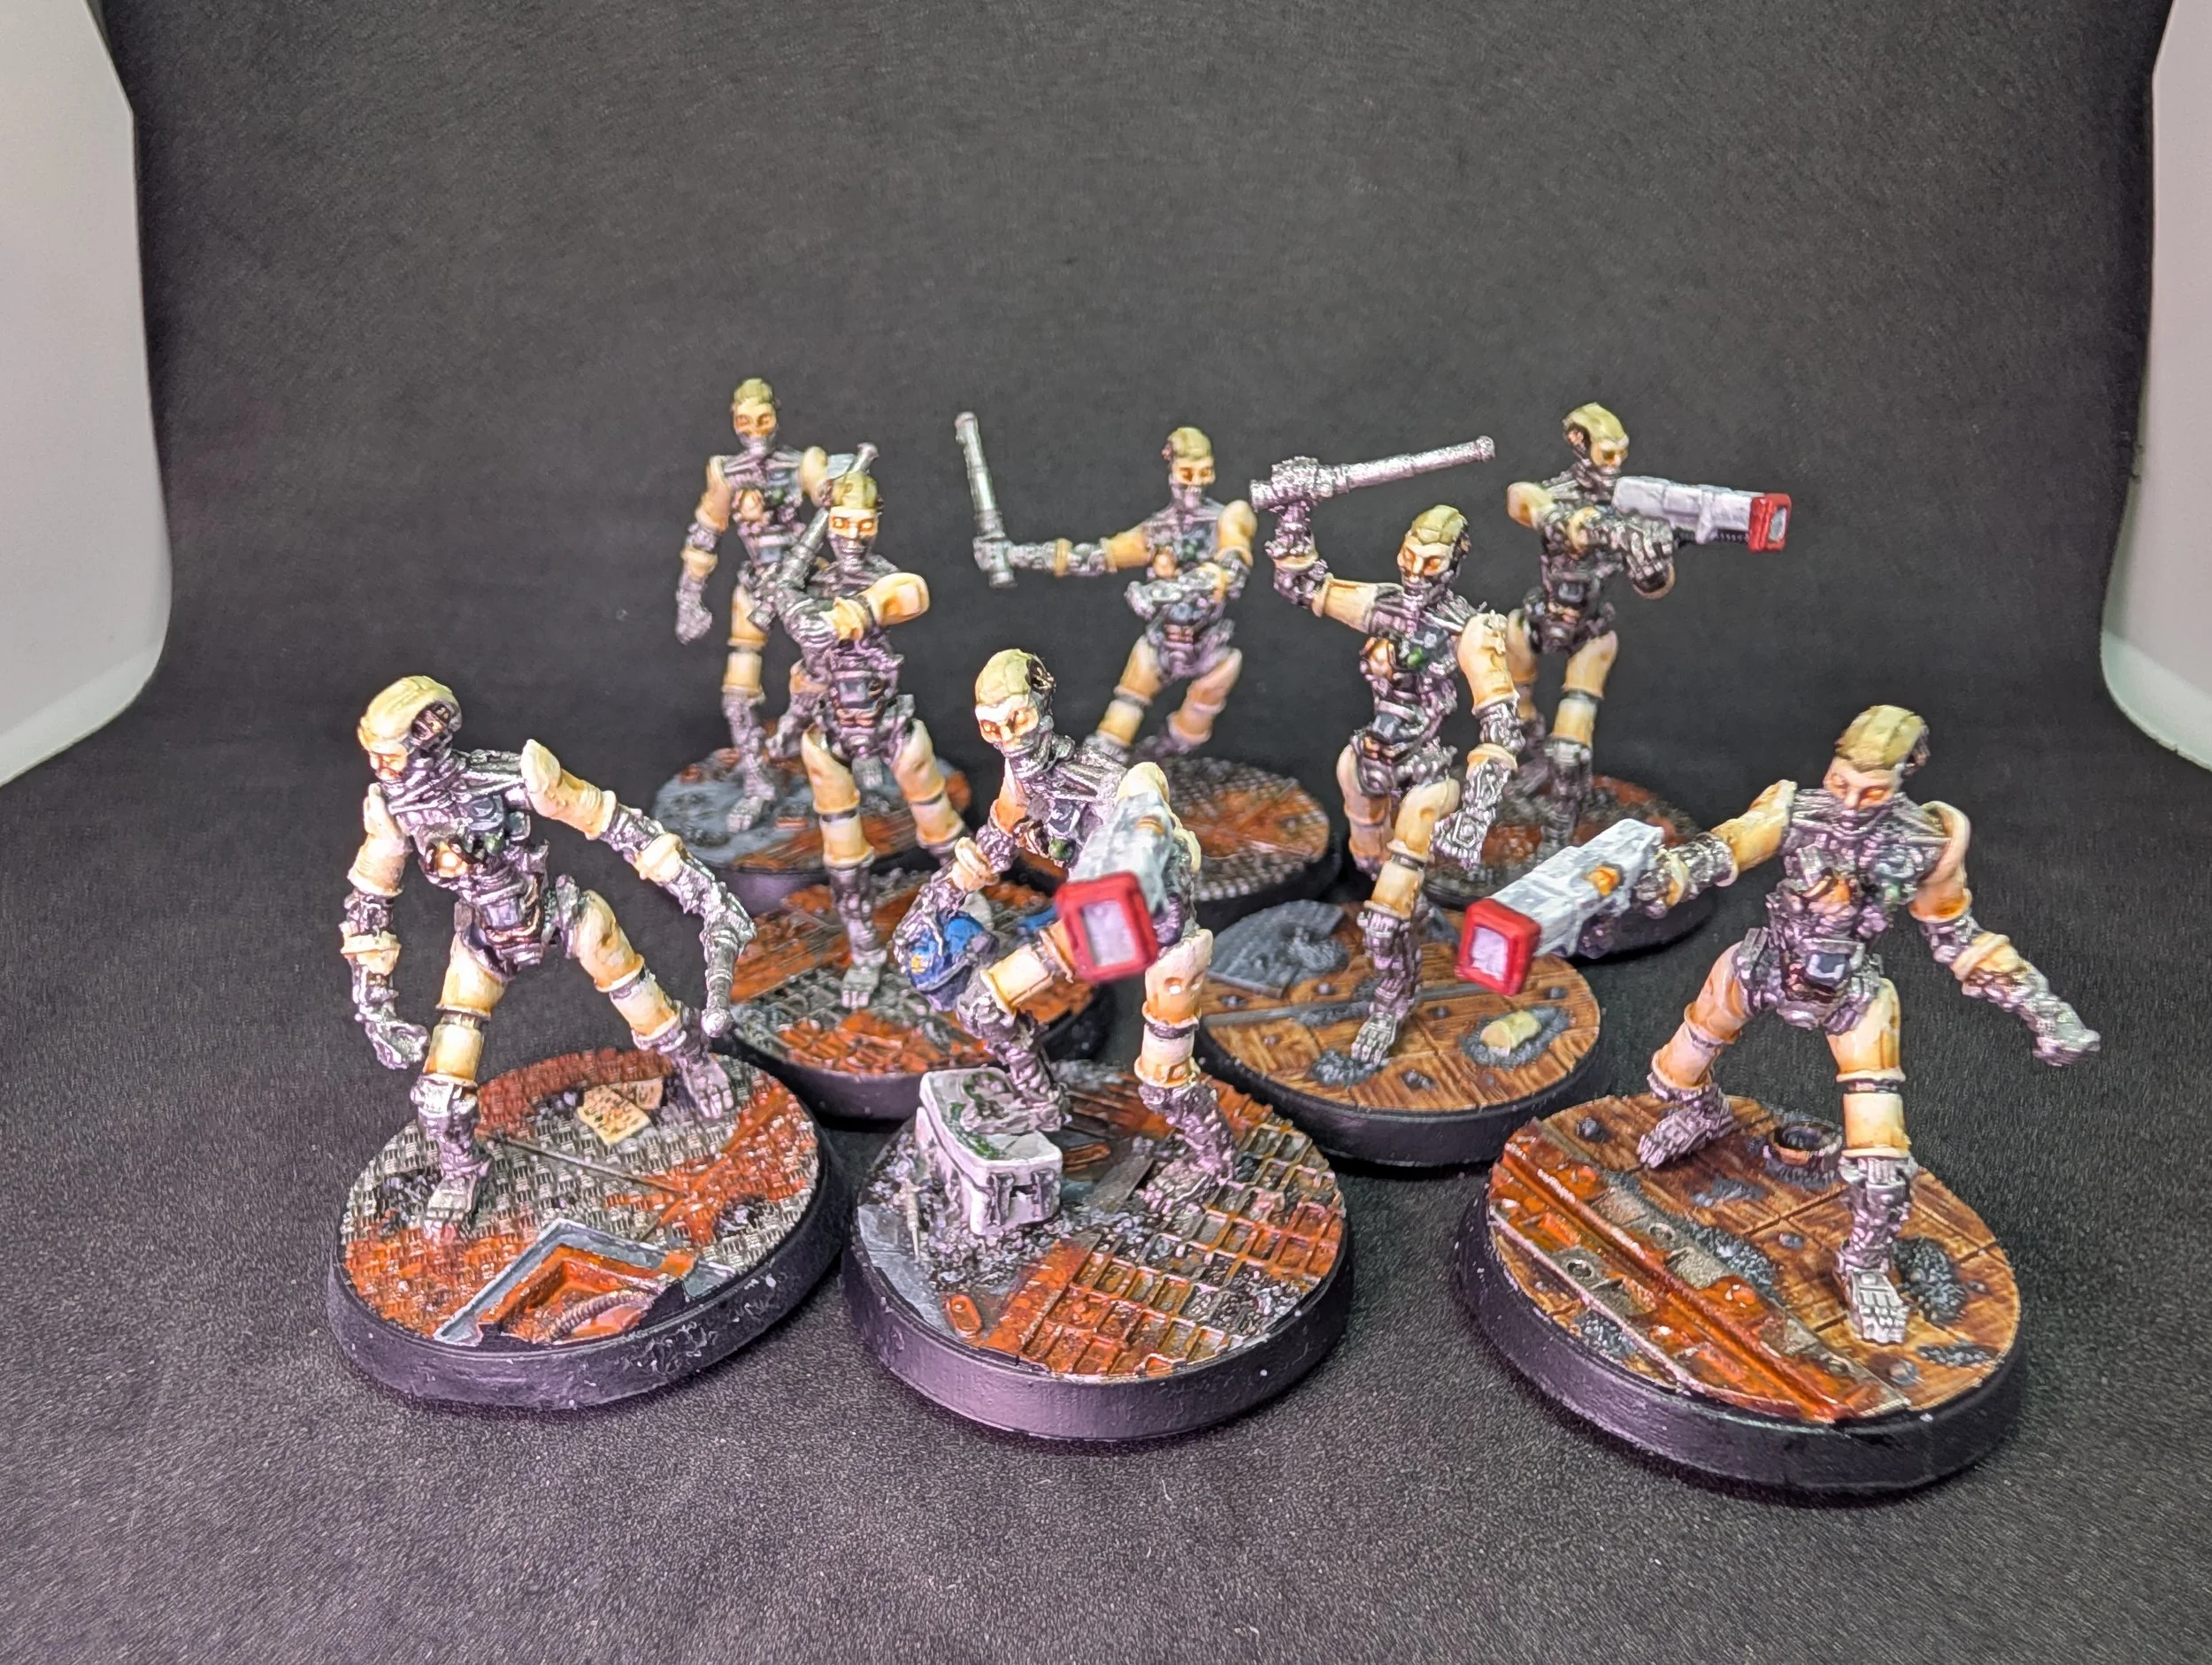
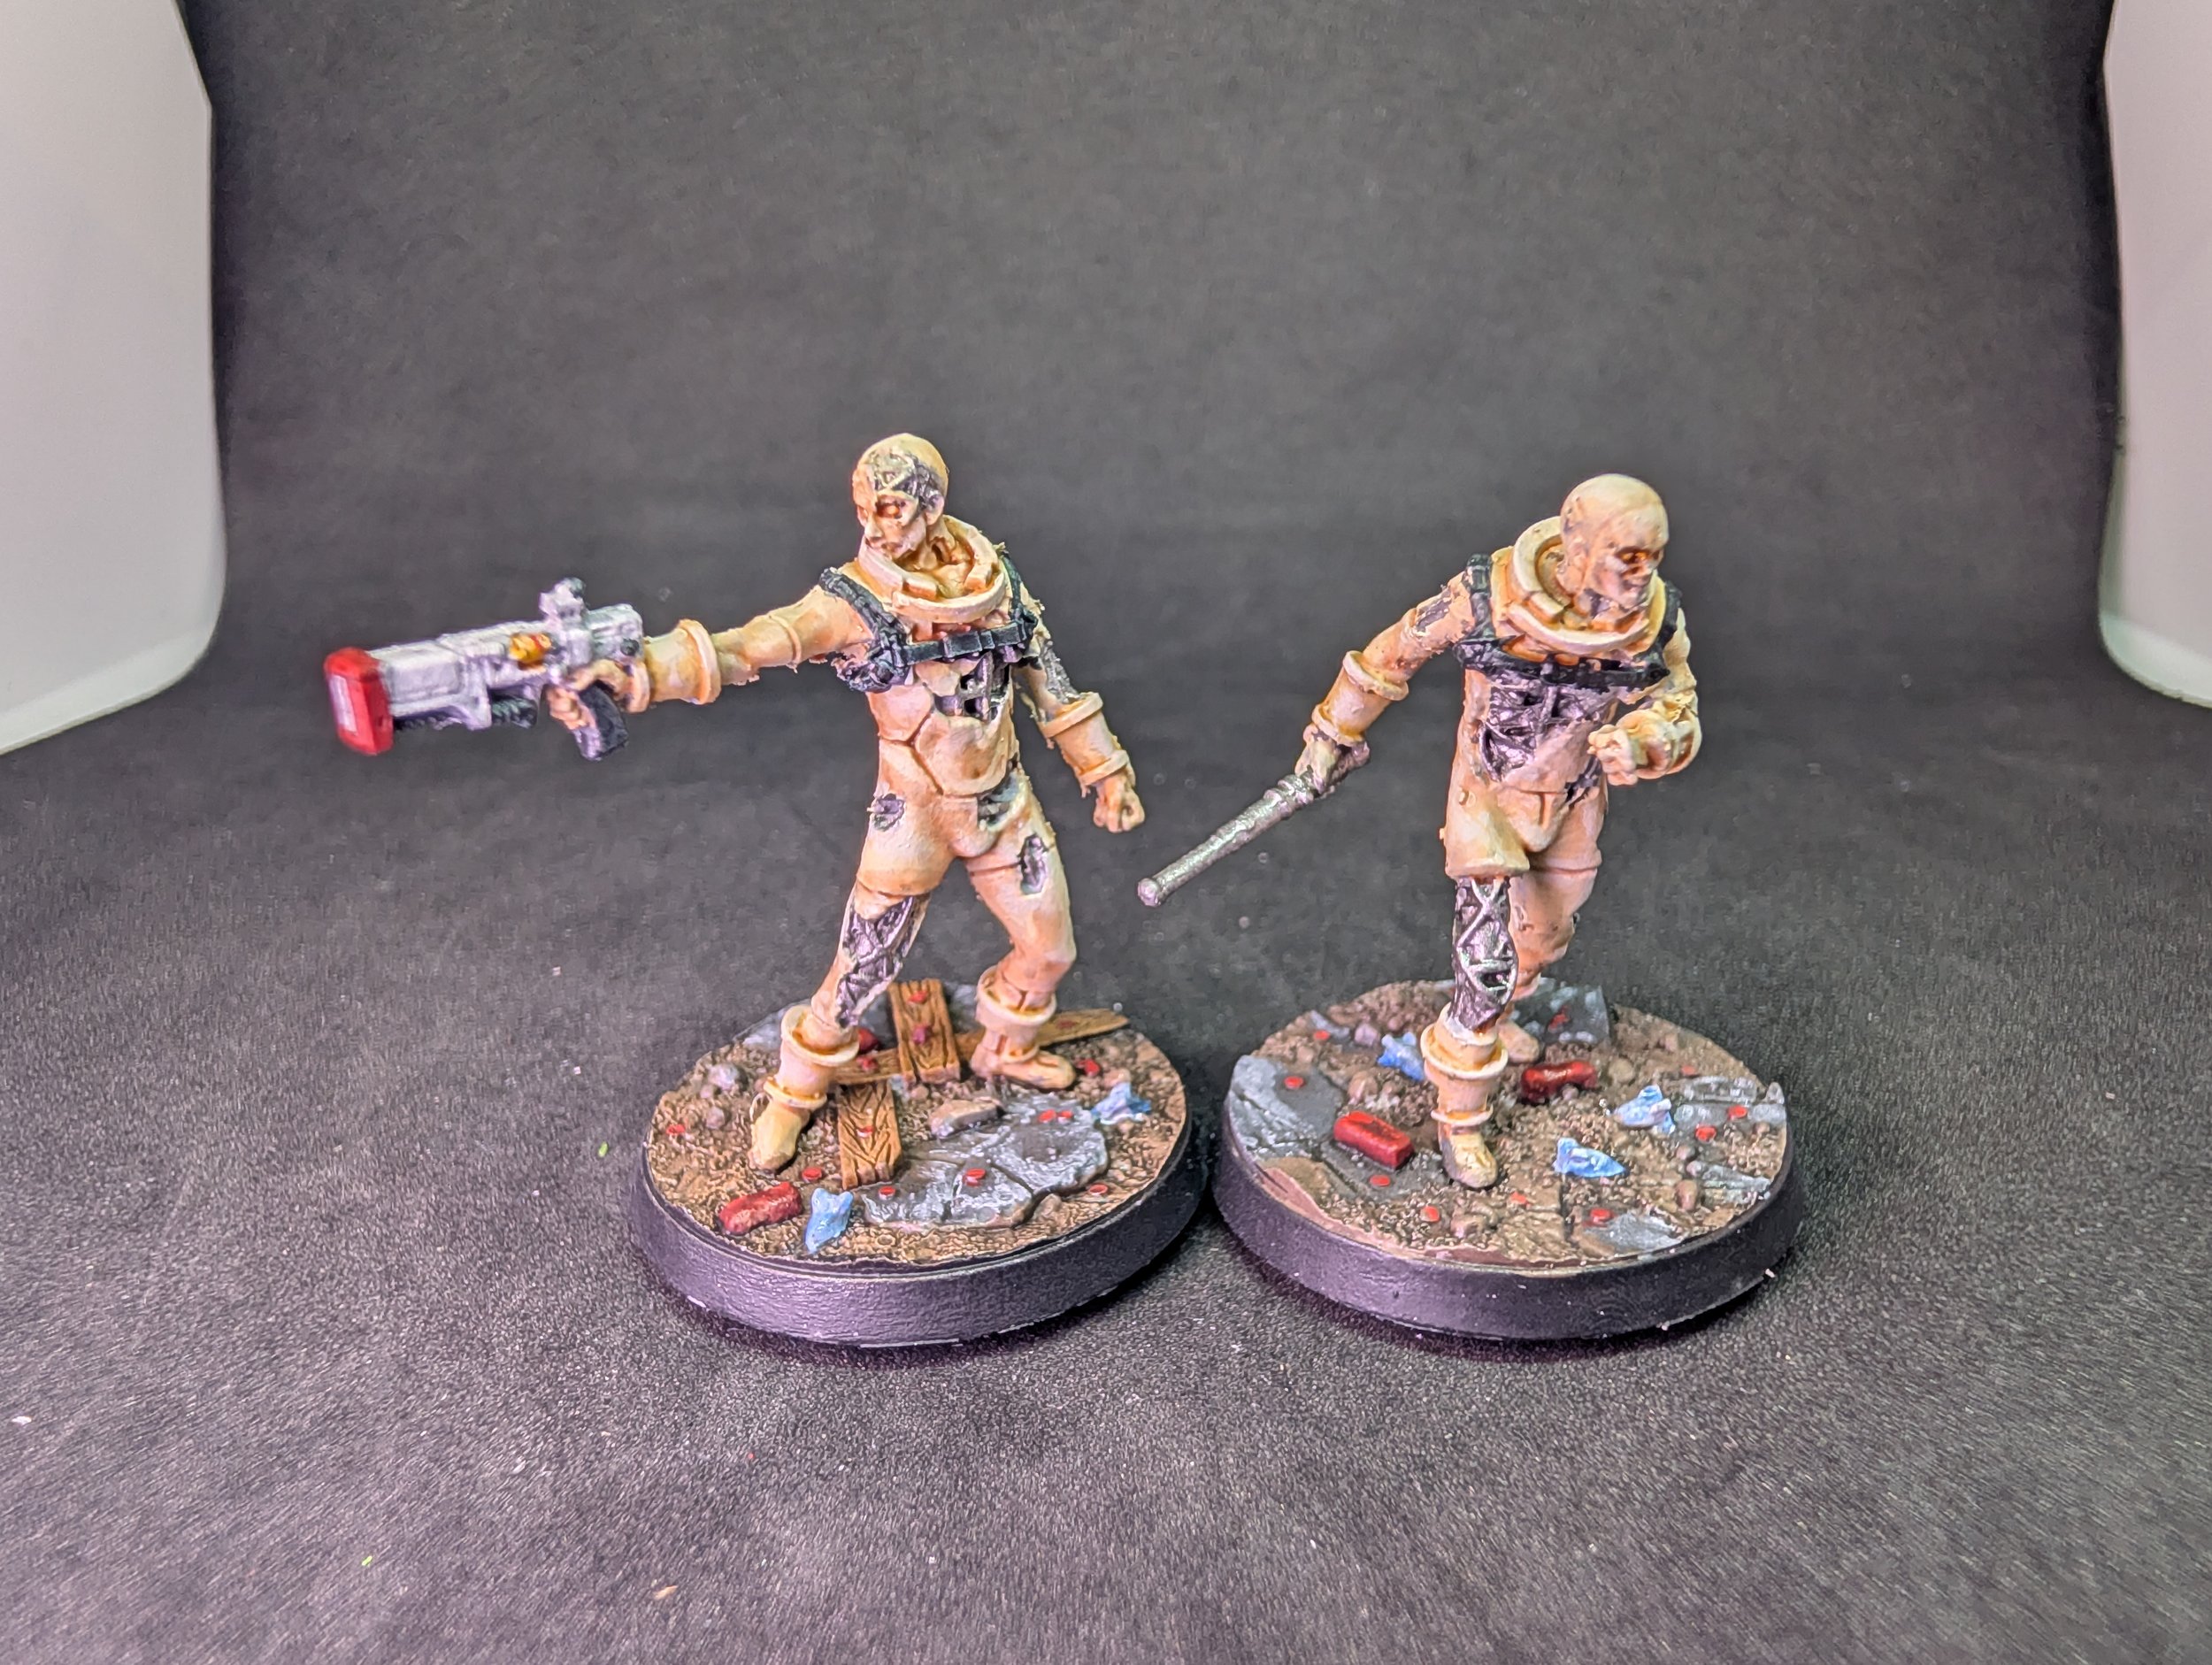
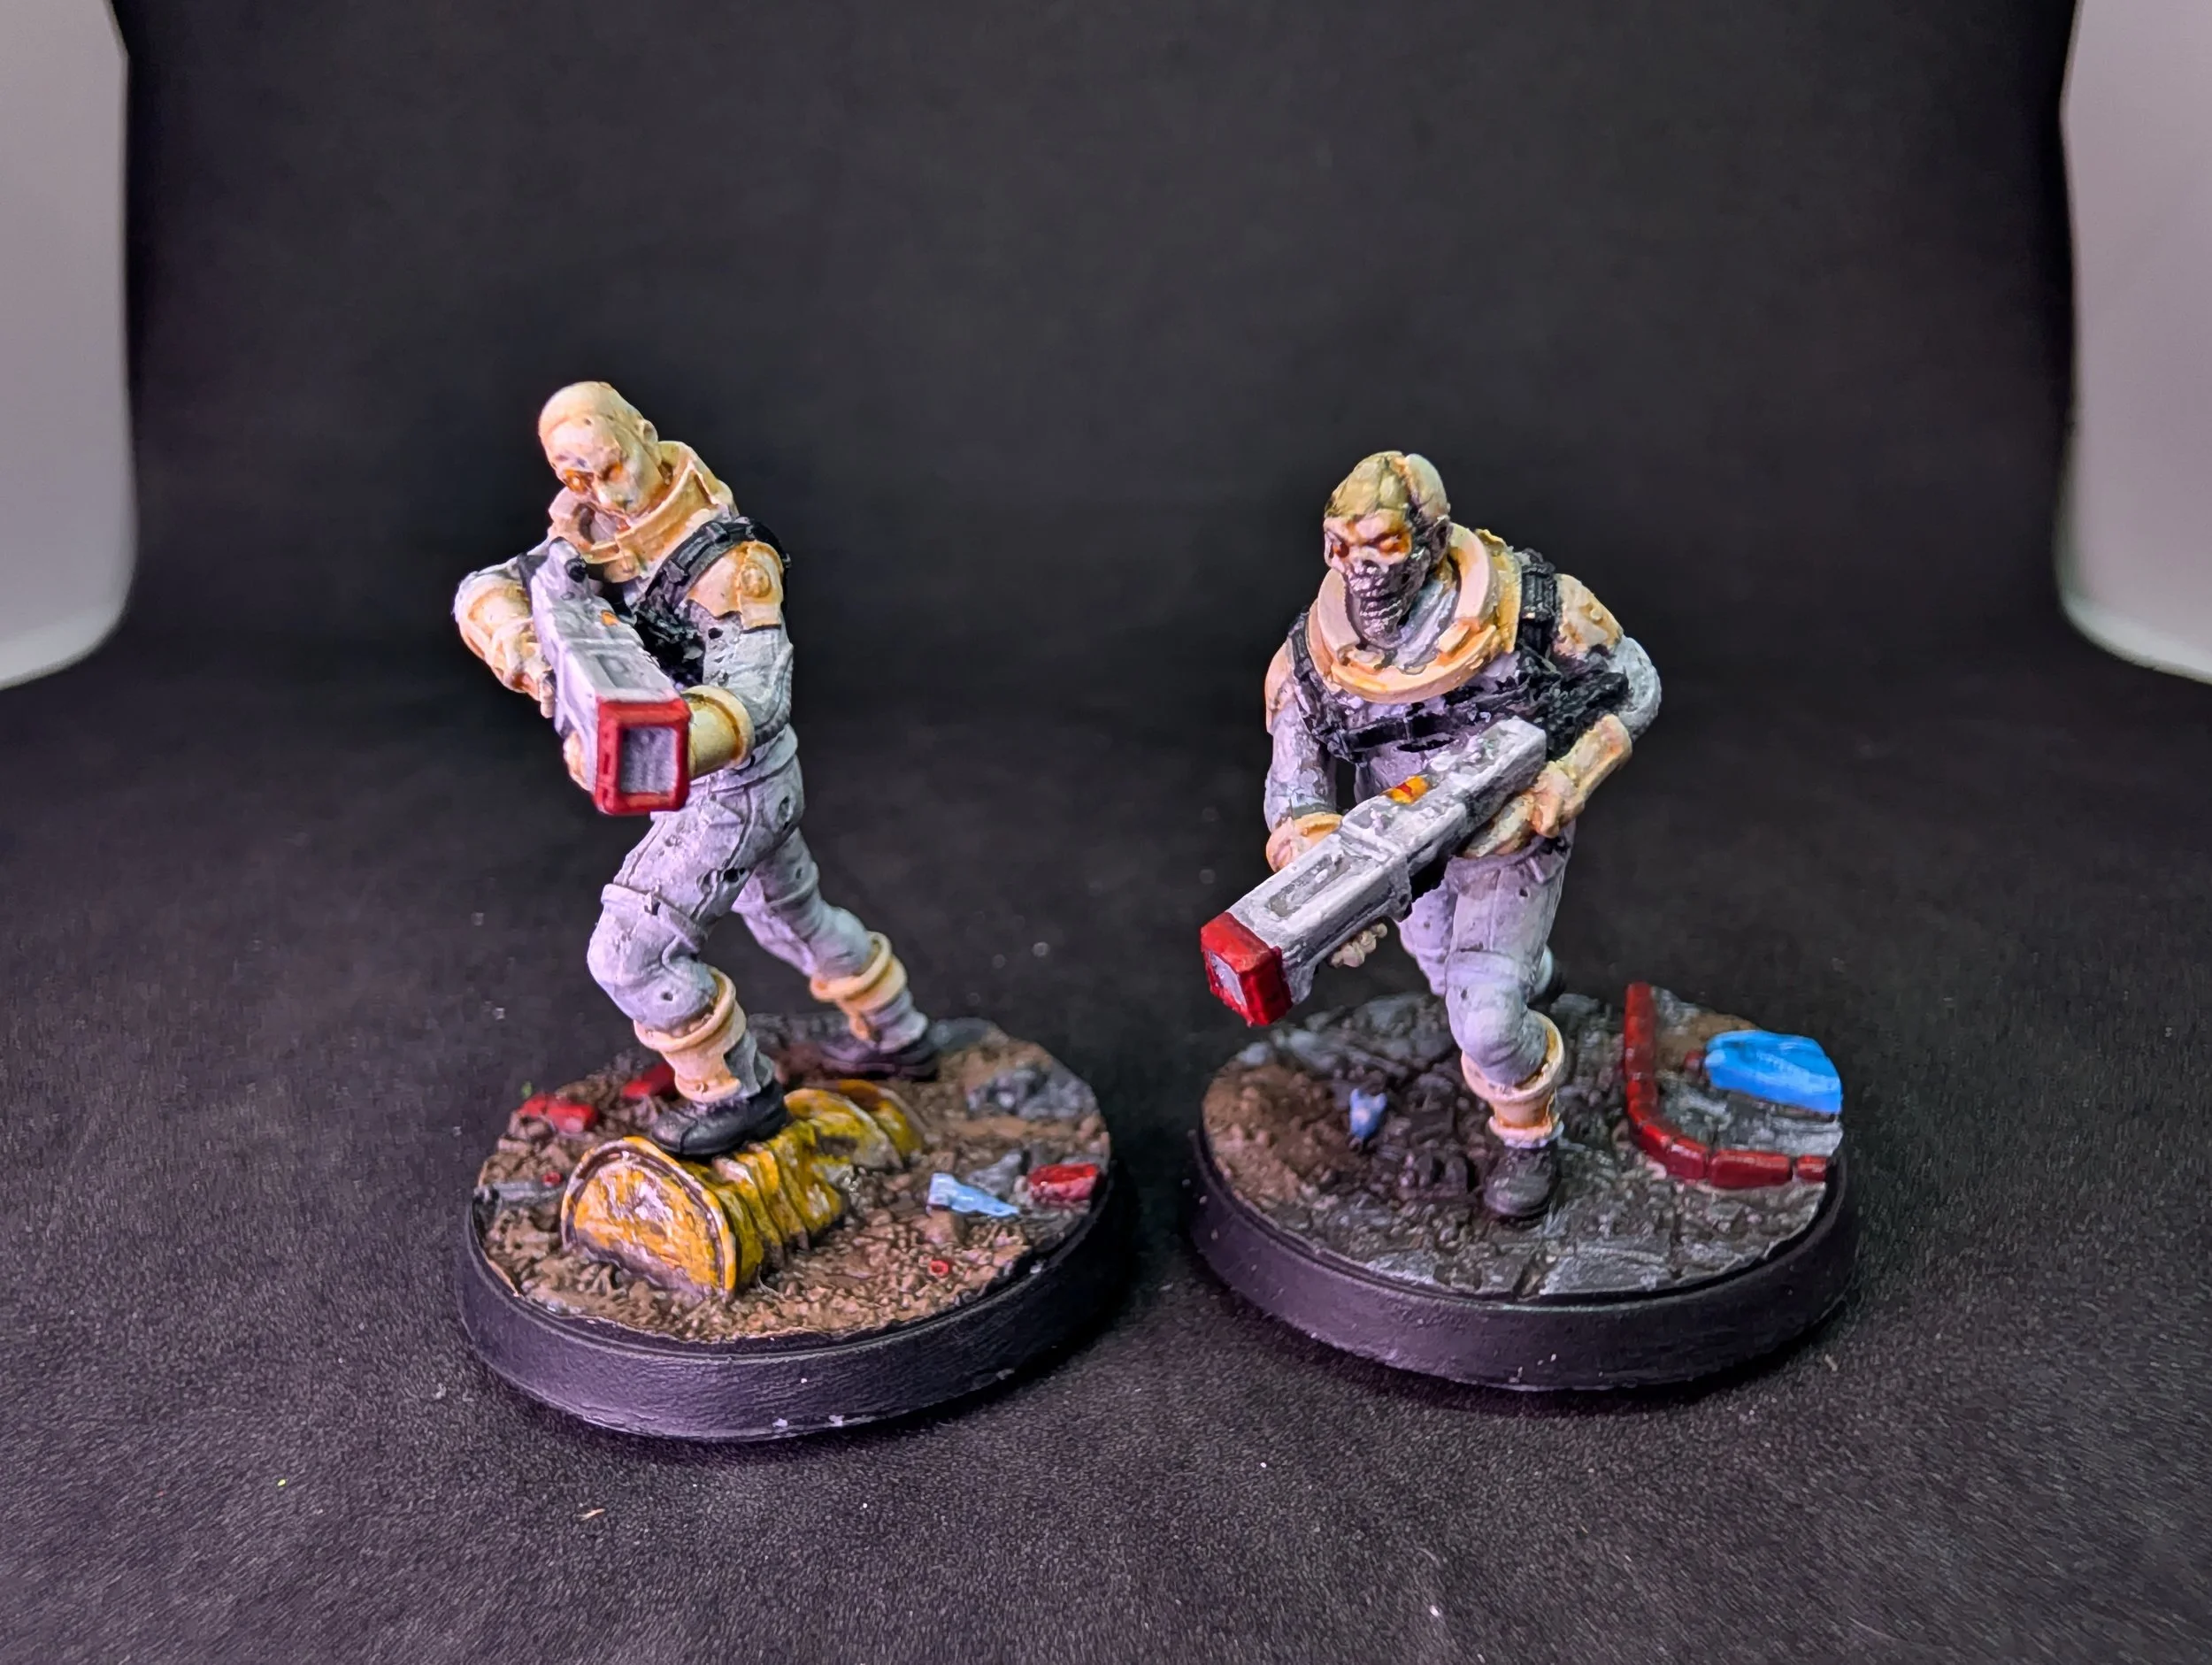
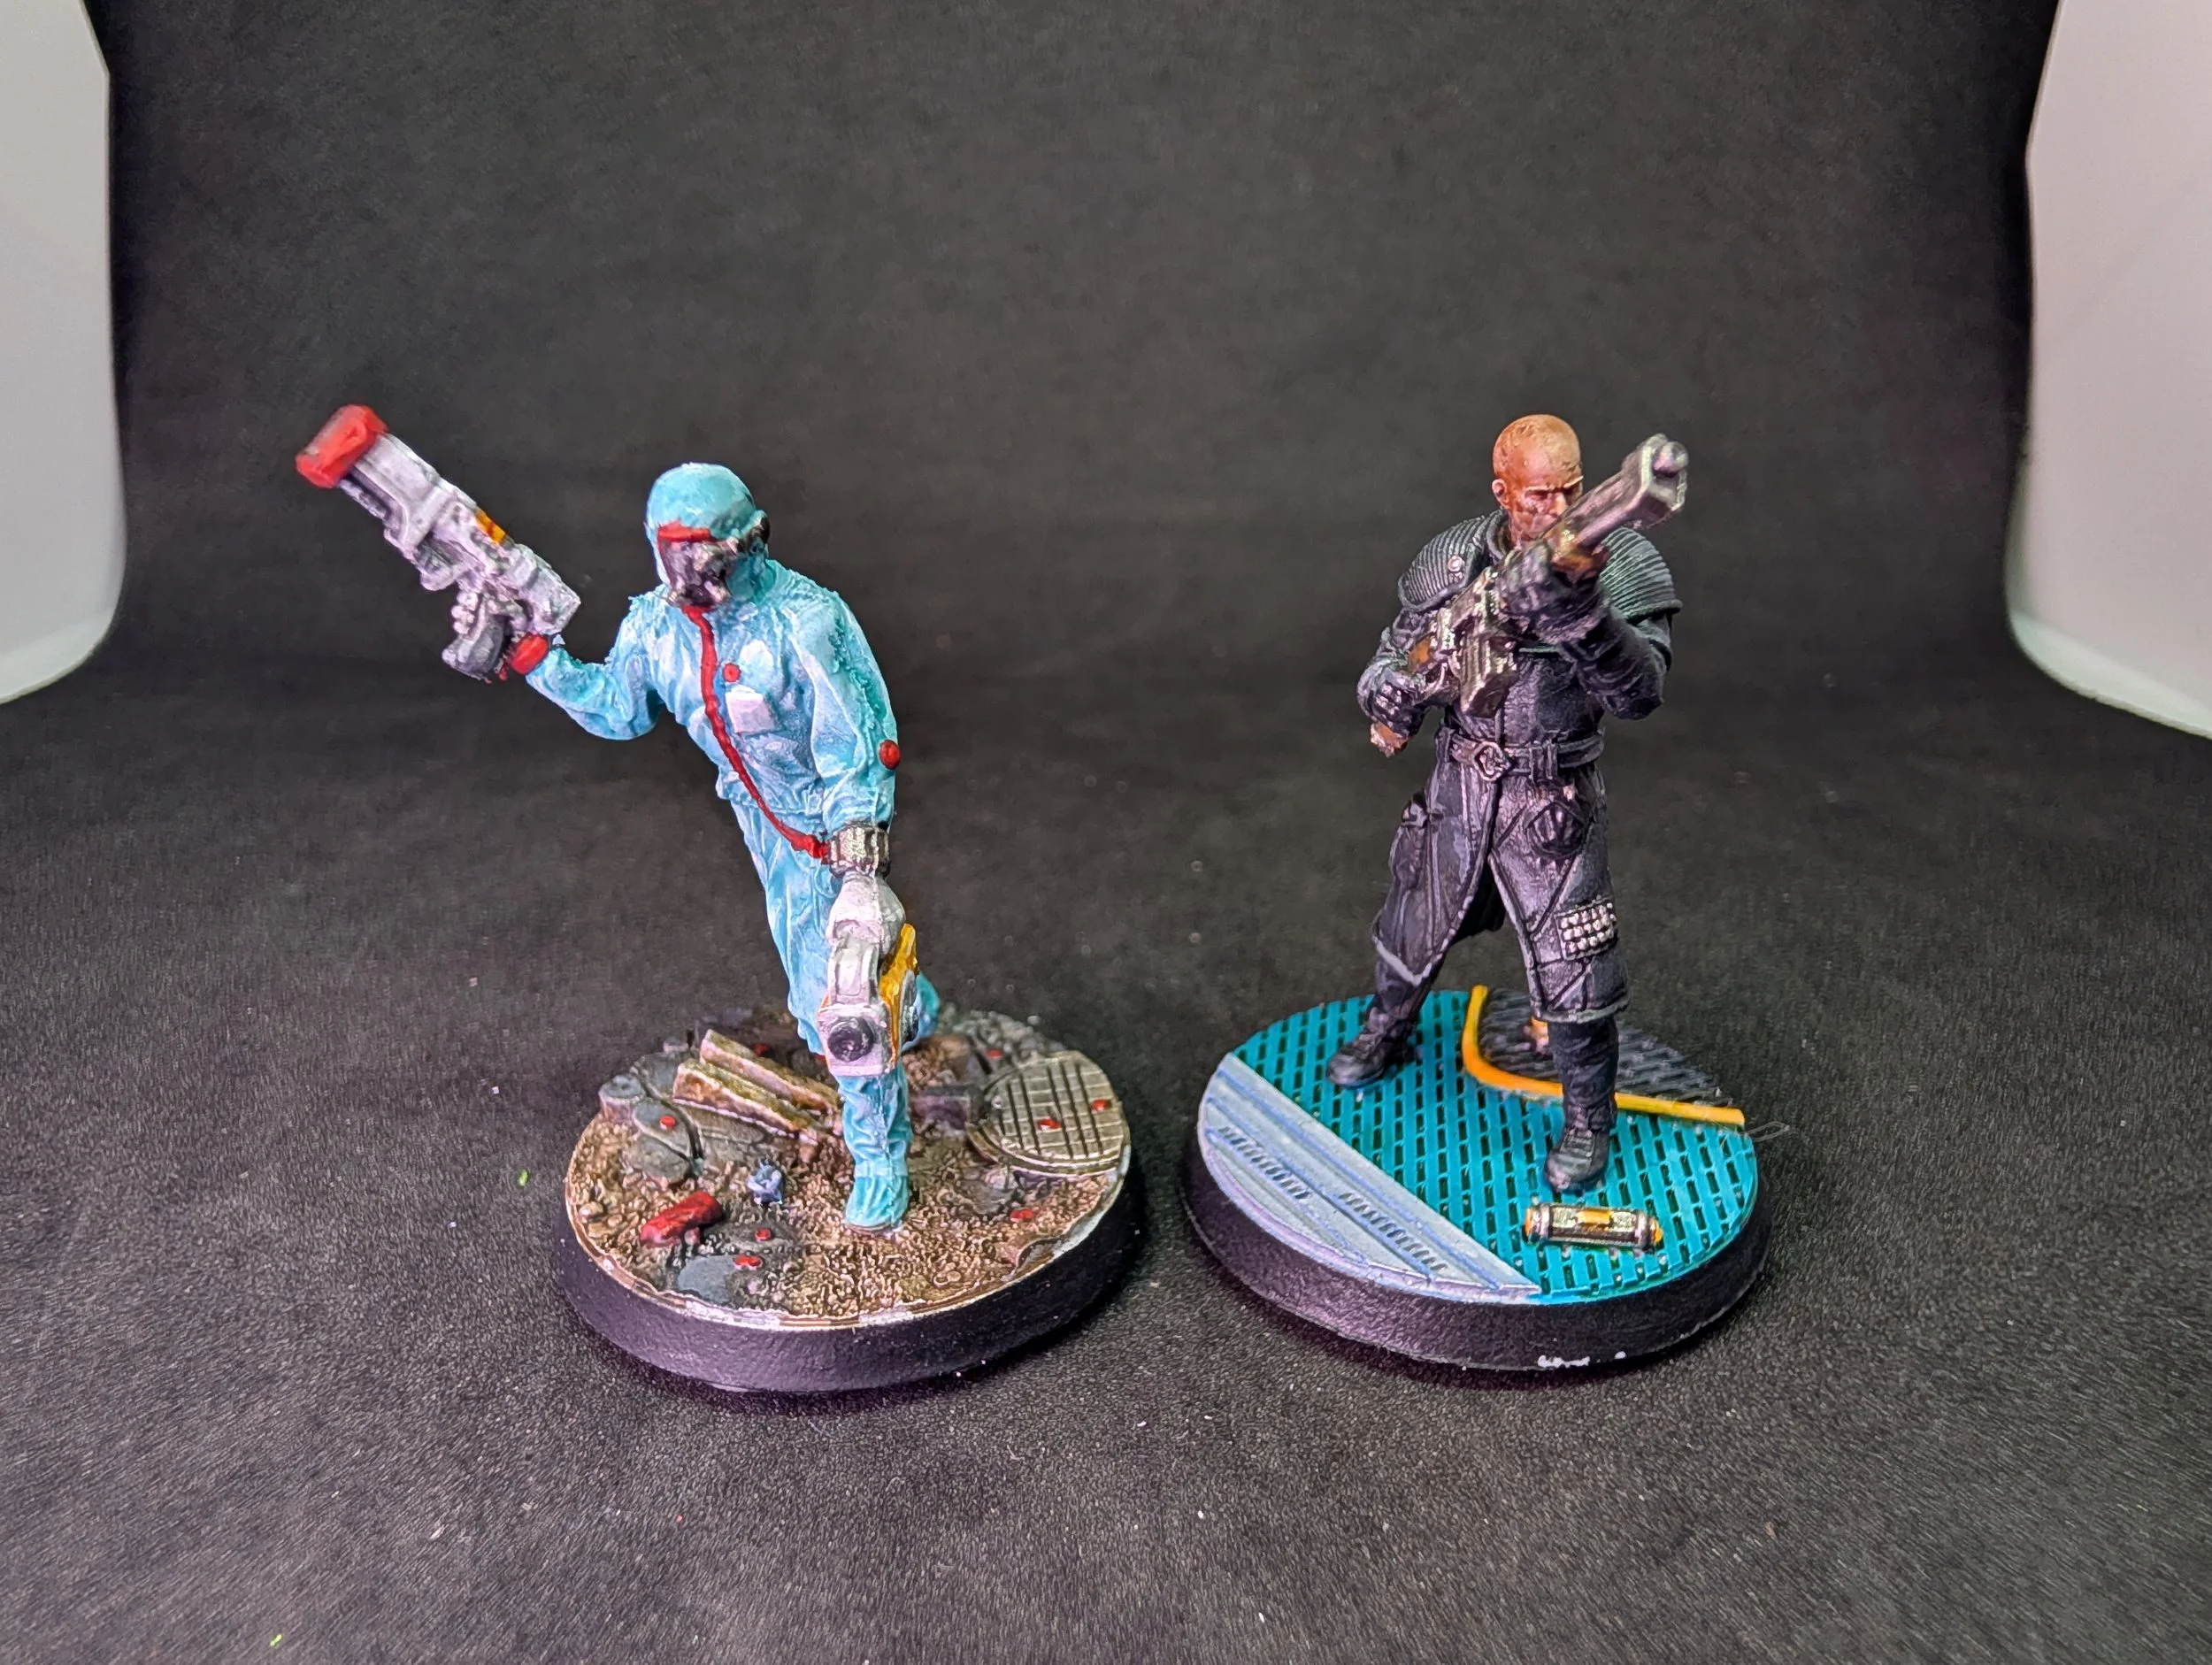
I managed to get all of my Institute models painted, too! There’s a set that I don’t have, which has another Courser, Kellogg and a synth with a missile launcher, but from what I do have, I get 8 Gen 1 Synths, who make up the bulk of the force, 4 Gen 2 Synths, where 2 of them are wearing the clothes of Synth Leaders, a Courser armed with a Combat Shotgun (and a badass base that made me want to have a full set of Institute terrain in that style) and a Scientist.